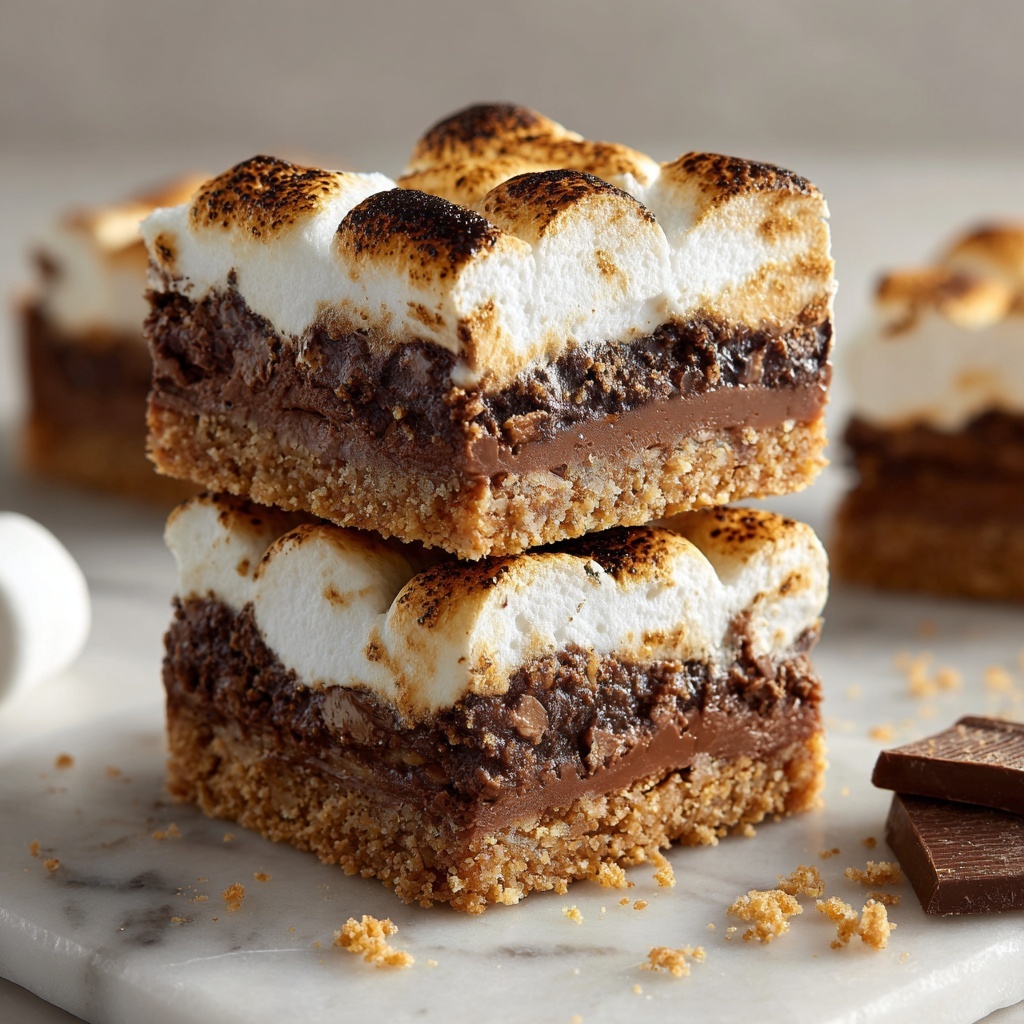
If you’re craving that nostalgic campfire treat in a quick, delicious, and shareable form, look no further than this irresistible S’mores Bar Recipe. It captures everything you love about s’mores—the crunchy graham cracker crust, melty Hershey’s chocolate, and perfectly toasted marshmallows—all layered decadently in a pan to be sliced and enjoyed by everyone. Whether it’s a cozy family gathering or a casual get-together, these bars deliver that warm, gooey delight that’s bound to bring smiles and satisfied sighs with every bite.
Ingredients You’ll Need
Gathering the ingredients for this S’mores Bar Recipe is refreshingly simple, yet every component plays a crucial role in creating that perfect balance of texture and flavor. From the graham cracker crumbs that form the crunchy base to the creamy butter that binds it all together, each ingredient contributes its own magic.
- 2 cups graham cracker crumbs: The foundation providing a crispy, slightly sweet crunch—and don’t skip on using fine crumbs for the best texture.
- 8-12 tablespoons butter (melted): Melted butter helps hold the crust together while adding a rich, buttery flavor that enhances the graham crackers.
- 1/2 cup powdered sugar: Adds a subtle sweetness and helps firm up the crust for easy slicing later on.
- 4 Hershey Chocolate Bars (4.4 ounces each): Classic milk chocolate bars lend that unmistakable s’mores flavor and melt beautifully over the crust.
- 1 package mini marshmallows: Tiny marshmallows layer on top, toasting into golden, gooey clouds of sweetness that crown the whole bar perfectly.
How to Make S’mores Bar Recipe
Step 1: Prepare Your Pan and Mix the Crust
Start by preheating your oven to 350 degrees Fahrenheit and greasing a 9×13-inch baking pan with non-stick spray. In a medium bowl, combine the graham cracker crumbs, powdered sugar, and melted butter, stirring gently until everything is evenly mixed. This crumbly blend will form that signature base for your s’mores bars, so make sure the butter evenly coats the crumbs for a perfectly bonded crust.
Step 2: Press and Bake the Crust
Next, firmly press the graham cracker mixture into the bottom and slightly up the sides of your prepared pan. Use your fingers to pack it tightly, creating a sturdy platform that will hold all the layers together while baking. Pop it in the oven for about 5 to 8 minutes, just until you notice the edges turning a light golden brown. This step ensures the crust will crisp up nicely when cooled.
Step 3: Layer the Chocolate
After removing the crust from the oven and allowing it to cool for a bit, lay the Hershey chocolate bars directly on top. Try to cover the crust completely; overlapping pieces slightly is totally okay. Return the pan to the oven for about 3 minutes so the chocolate just starts to soften and shine—this helps it meld beautifully with the marshmallow topping.
Step 4: Add Marshmallows and Broil to Toast
Once the chocolate has softened, sprinkle the mini marshmallows evenly on top, packing them close together to create a fluffy, gooey layer. Then switch your oven setting to broil. This part is key—stay alert and watch the marshmallows closely as they broil, since they toast quickly and can burn if left unattended. As soon as they turn golden brown and begin bubbling, take the pan out immediately for the best caramelized finish.
Step 5: Cool and Cut
Give the bars a thorough cooling period—about 1 to 2 minutes after the broil, then ideally chill them in the refrigerator until fully set. This chilling makes cutting easier and keeps the gooey marshmallows from sticking too much. For clean slices, heat a sharp knife under hot water, dry it off promptly, and slice. Repeat rinsing the knife if needed to maintain smooth cutting through these sticky, indulgent bars.
How to Serve S’mores Bar Recipe

Garnishes
A simple dusting of powdered sugar or a drizzle of melted chocolate over each bar adds a little extra flair without overwhelming the classic flavors. For a fun twist, sprinkle some crushed graham crackers or finely chopped nuts on top just before serving to introduce an added layer of crunch.
Side Dishes
These bars are wonderfully rich on their own, but pairing them with a cold glass of milk elevates the experience to perfection. You can also serve alongside fresh berries or a scoop of vanilla ice cream to add a light, refreshing contrast to the sweet and toasted layers.
Creative Ways to Present
To impress guests, consider cutting the s’mores bars into bite-sized squares and serving them on a rustic wooden board with twinkling fairy lights nearby for that campfire vibe. Wrapping individual bars in parchment paper tied with twine makes them charming party favors or picnic treats. Layered in clear glass jars, they also make a stunning, sweet table centerpiece that invites everyone to dig in.
Make Ahead and Storage
Storing Leftovers
If you somehow manage to have leftovers, keep them airtight in the refrigerator. This will preserve their texture—allowing the crust to stay crisp and the marshmallows soft but stable—ready to enjoy in the next day or two without losing their magic.
Freezing
You can definitely freeze these bars for longer storage. Wrap them tightly in plastic wrap and foil before placing in the freezer. When you’re ready to indulge again, thaw them overnight in the fridge to maintain that delightful gooeyness without sogginess.
Reheating
For a warm hit of nostalgia, gently reheat individual bars in the microwave for about 10-15 seconds. This softens the chocolate and marshmallows without turning them rubbery. Just be careful not to overheat, or you’ll lose that lovely toasted texture everyone adores.
FAQs
Can I use different chocolate bars for this S’mores Bar Recipe?
Absolutely! While classic Hershey’s bars offer the authentic flavor, feel free to experiment with dark chocolate, flavored bars, or even peanut butter cups for a fun twist on the traditional s’mores experience.
Is it necessary to broil the marshmallows?
Broiling is key to achieve that beautiful toasted marshmallow top that makes these bars so irresistible. If you don’t have a broiler, you could use a kitchen torch or toast the marshmallows carefully under a grill, but watching closely is essential to avoid burning.
Can I make these bars gluten-free?
Yes! Simply swap the graham cracker crumbs with a gluten-free alternative. Many stores offer gluten-free graham crackers that work perfectly for this recipe without compromising taste or texture.
How long will these bars stay fresh?
Stored properly in an airtight container in the refrigerator, your s’mores bars will stay fresh for up to 3 days. Beyond that, they may start losing their ideal texture but will still taste delicious.
Can I double this recipe for a larger crowd?
Definitely! Just double all the ingredients and bake in a larger pan or use two 9×13 pans. The baking times may vary slightly, so keep an eye on the crust and marshmallow browning to ensure perfect results.
Final Thoughts
There’s something truly comforting and joyful about a good S’mores Bar Recipe—and this one truly nails the balance of nostalgic campfire flavors with easy, at-home convenience. Whether you’re serving them to excited kids, friends, or just indulging yourself, these bars bring warmth and sweetness to any occasion. So grab those ingredients and get started today—you’ll be rewarded with gooey, melty slices that feel like a cozy hug in every bite!
Print
S’mores Bar Recipe
- Prep Time: 10 minutes
- Cook Time: 15 minutes
- Total Time: 25 minutes
- Yield: 16 servings
- Category: Dessert
- Method: Baking
- Cuisine: American
Description
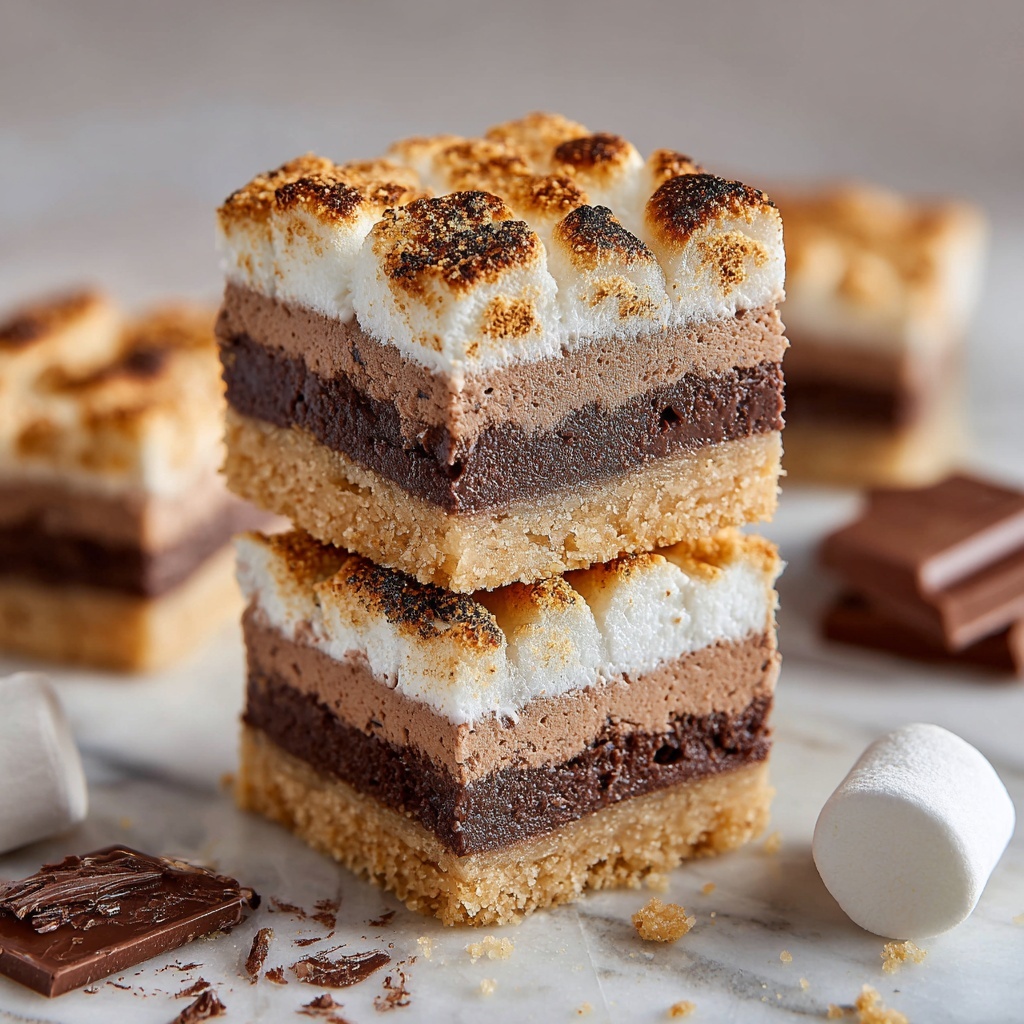
Delight in this classic treat with our easy-to-make S’mores Bar recipe. Featuring a crispy graham cracker crust, melty Hershey’s chocolate bars, and golden toasted mini marshmallows, these bars bring the nostalgic campfire flavor to your kitchen in just 25 minutes. Perfect for parties, gatherings, or a tasty dessert anytime.
Ingredients
Crust
- 2 cups graham cracker crumbs
- 8–12 tablespoons butter, melted
- 1/2 cup powdered sugar
Topping
- 4 Hershey Chocolate Bars (4.4 ounces each)
- 1 package mini marshmallows
Instructions
- Preheat Oven: Preheat your oven to 350 degrees Fahrenheit to get it ready for baking the crust.
- Prepare Pan: Grease a 9×13 inch baking pan with non-stick butter spray to prevent sticking.
- Mix Crust: In a medium bowl, combine the graham cracker crumbs, powdered sugar, and melted butter. Stir well until the mixture is evenly moistened and crumbly.
- Press Crust: Transfer the crust mixture into the prepared baking pan and firmly press it down along the bottom and sides to pack it tightly and evenly.
- Bake Crust: Place the pan in the oven and bake for 5-8 minutes, until the edges turn a light golden brown. The crust will harden as it cools.
- Cool Crust: Remove the pan from the oven and allow the crust to cool completely to set properly.
- Layer Chocolate: Break the Hershey bars into pieces and lay them evenly on top of the cooled crust, covering it as much as possible.
- Melt Chocolate: Return the pan to the oven for about 3 minutes, just until the chocolate begins to melt and looks shiny.
- Cool Slightly: Let the pan cool for 1-2 minutes after removing it from the oven.
- Layer Marshmallows: Place mini marshmallows closely next to each other on top of the melted chocolate layer, covering it completely.
- Broil Marshmallows: Set your oven to broil. Place the pan in the oven and watch carefully for about 2 minutes until the marshmallows are toasted and golden brown. Be vigilant to prevent burning.
- Cool Completely: Let the s’mores bars cool completely. For firmer bars that are easier to cut, refrigerate them after they have cooled to room temperature.
- Serve: Use a sharp knife warmed under hot water and dried to cut through the sticky bars. Repeat warming the knife if it becomes sticky. Serve and enjoy your gooey s’mores bars!
Notes
- The crust will harden as it cools after baking; pressing it firmly helps hold it together well.
- Broiling marshmallows requires close attention as they can burn quickly—keep a watchful eye while toasting.
- Refrigerating the bars after cooling makes them easier to slice.
- Warm a sharp knife under hot water before cutting to prevent sticking, repeating as necessary.


