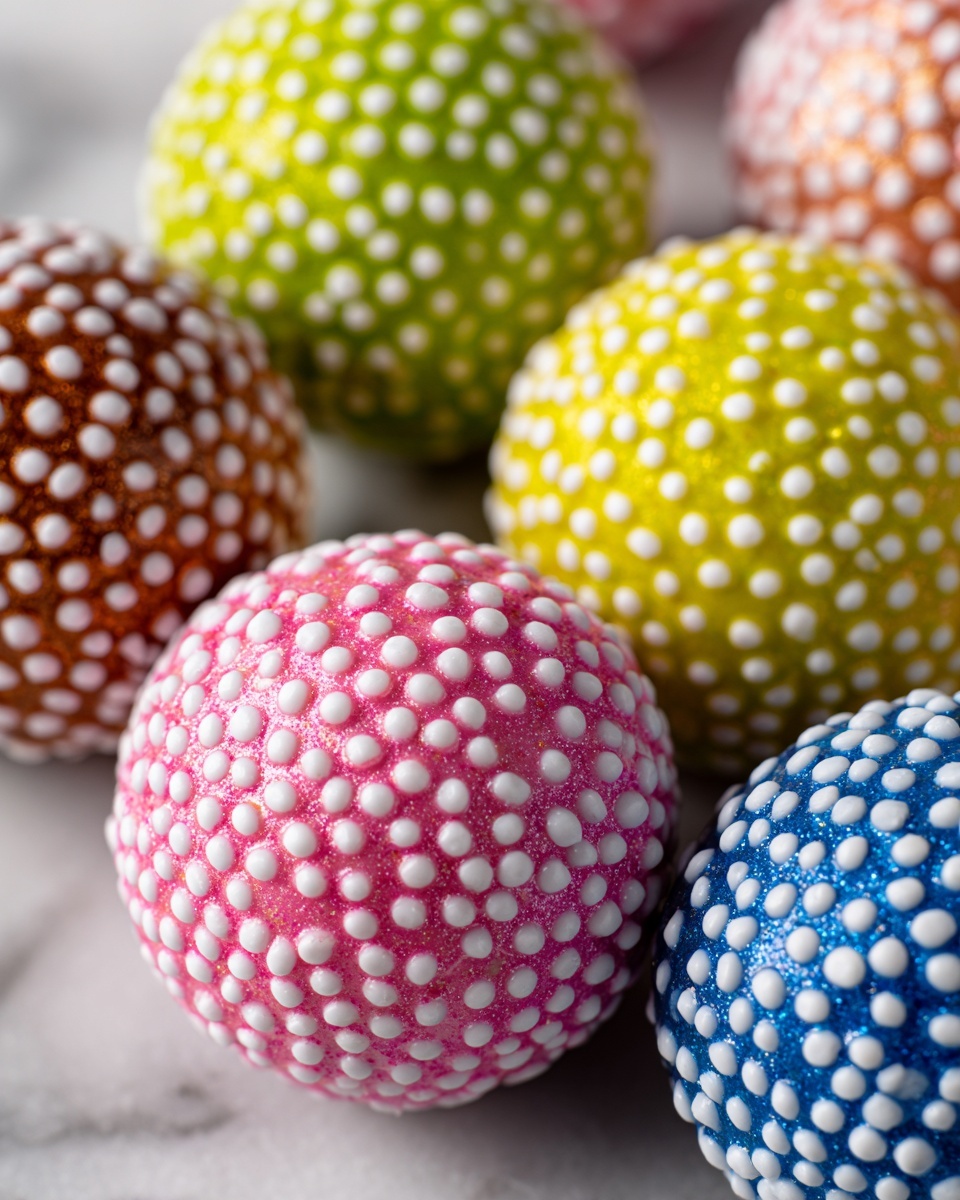
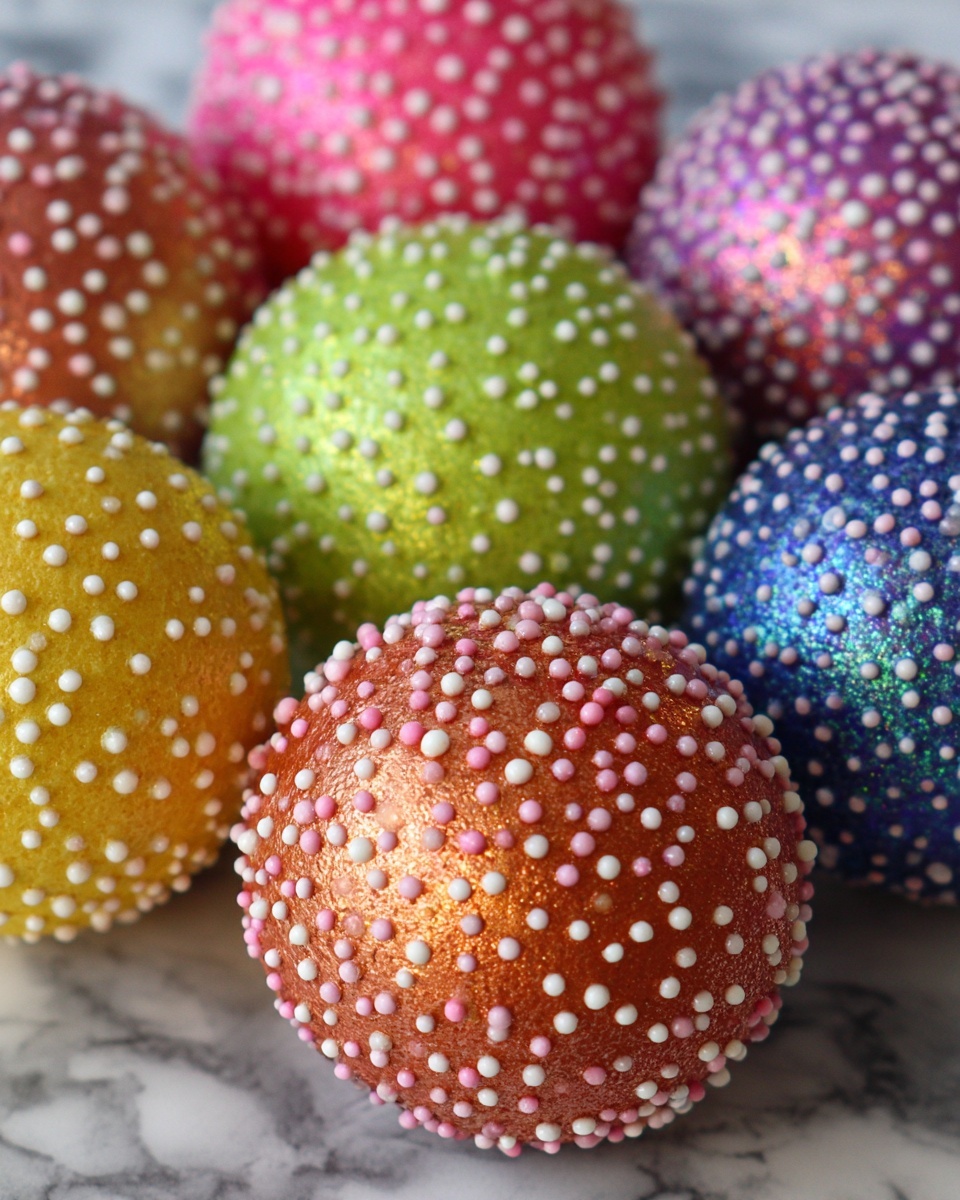
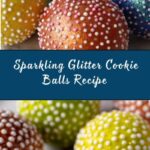
If you have a sweet tooth and love a little sparkle in your treats, this Glitter Cookie Balls Recipe is an absolute showstopper you need to try. These bite-sized delights combine the rich, creamy tang of cream cheese with the satisfying crunch of your favorite crushed cookies, all wrapped in a luscious coating of smooth white chocolate and topped with shimmering edible glitter. They are perfect for celebrations, gifts, or just an everyday indulgence that feels extra special. Once you make these, they’ll quickly become a go-to treat that brings smiles and sparkle to any occasion.
Ingredients You’ll Need
Creating the perfect Glitter Cookie Balls Recipe is all about using simple but essential ingredients that each play a unique role in making these treats decadent and delightful. From the cookie crumbs that provide texture to the cream cheese that brings softness, each element contributes to the full experience.
- 2 cups crushed cookies: Use Oreos, vanilla wafers, or shortbread for a crispy, flavorful base that gives the balls texture and character.
- 8 oz cream cheese, softened: Adds creamy richness and helps bind the cookie crumbs into soft, moldable balls.
- 1 tsp vanilla extract (optional): Enhances the flavor with a warm, aromatic hint that complements the cookies perfectly.
- 12 oz white chocolate chips: For a beautifully smooth and sweet coating—milk chocolate can be used as an alternative for a richer taste.
- 2 tbsp vegetable or coconut oil: Helps melt the chocolate to a glossy, easy-to-dip consistency ensuring every bite is irresistibly smooth.
- Edible glitter or shimmer powder: The magic finishing touch that makes these cookie balls sparkle and dazzle, perfect for festive occasions or when you want to wow someone special.
How to Make Glitter Cookie Balls Recipe
Step 1: Prepare the Cookie Mixture
Start by crushing your cookies into fine crumbs. You can use a food processor for a quick crumble or place them in a sealed plastic bag and crush with a rolling pin. This base is the heart of your Glitter Cookie Balls Recipe, giving every bite that perfect crunch and flavor foundation.
Step 2: Combine with Cream Cheese
Mix the softened cream cheese and vanilla extract into the crushed cookie crumbs. Stir everything well until the mixture is sticky and moldable but not overly wet. This balance is crucial for shaping the cookie balls that hold together beautifully without being too dense or crumbly.
Step 3: Shape the Cookie Balls
Roll the mixture into small, roughly 1-inch diameter balls. Don’t worry about perfection here—a little rustic charm makes them even more inviting. Place each ball on a parchment-lined baking sheet to keep them home for their chocolate coat.
Step 4: Chill the Cookie Balls
Pop the tray into the refrigerator for 20 to 30 minutes to firm up the balls. This chilling step is key because it makes them much easier to dip later, helping the coating stick smoothly without the cookie balls losing shape.
Step 5: Melt the Chocolate Coating
While your cookie balls chill, melt the white chocolate chips together with the oil. Use a microwave in short bursts, stirring frequently, or a double boiler for more control. The oil makes the chocolate glossy and runnier so it will coat every curve of your cookie balls perfectly.
Step 6: Coat the Cookie Balls
Dip each chilled cookie ball into the melted chocolate, using a fork or spoon to maneuver it. Let the extra chocolate drip off before transferring back to the parchment. This coating step turns those modest cookie balls into something truly indulgent and eye-catching.
Step 7: Add Edible Glitter
While the coating is still wet, sprinkle on plenty of edible glitter or shimmer powder. This is where your Glitter Cookie Balls Recipe truly comes to life, dazzling with sparkle and turning simple bites into festive gems that catch the light beautifully.
Step 8: Set the Chocolate
Refrigerate the coated balls for another 15 to 20 minutes so the chocolate hardens fully, ensuring each ball has a perfect snap on the outside and creamy center inside.
Step 9: Serve and Enjoy
Your Glitter Cookie Balls are now ready to enjoy! Serve them at parties, give as gifts, or simply treat yourself to some glittering sweetness that brightens any day.
How to Serve Glitter Cookie Balls Recipe

Garnishes
Enhance these sparkling treats by adding extra edible glitter, crushed nuts, or tiny edible pearls on top. These little touches add texture and make them even more visually stunning when presented at gatherings.
Side Dishes
Pair Glitter Cookie Balls with a light, refreshing beverage like sparkling lemonade or a cup of rich coffee to balance out their sweetness. A fresh fruit platter can also complement the richness perfectly.
Creative Ways to Present
Arrange these cookie balls on decorative trays, in colorful mini cupcake liners, or on a tiered cake stand to create an inviting dessert display. Wrapping individual balls in clear cellophane tied with ribbons makes adorable party favors or gift treats.
Make Ahead and Storage
Storing Leftovers
Keep any leftover Glitter Cookie Balls in an airtight container in the refrigerator. They should stay fresh and delicious for up to a week, making it easy to enjoy leftovers without losing their signature texture and sparkle.
Freezing
You can freeze these cookie balls in a single layer on a baking sheet first, then transfer them to a freezer-safe container or bag. They’ll last for up to 2 months, so you can prepare a batch ahead of time for any upcoming celebration.
Reheating
Allow frozen cookie balls to thaw in the refrigerator overnight. Serve chilled or at room temperature for the best texture. Avoid heating them as the chocolate coating may lose its shine and texture when warmed.
FAQs
Can I use other types of cookies for this recipe?
Absolutely! While Oreos, vanilla wafers, and shortbread are popular, you can experiment with ginger snaps, graham crackers, or any cookie that crumbles easily and complements cream cheese.
Is the vanilla extract necessary in the Glitter Cookie Balls Recipe?
The vanilla extract is optional but highly recommended. It adds a warm, aromatic note that enhances the overall flavor and ties the cookie and cream cheese together beautifully.
Can I use dark chocolate instead of white chocolate?
Certainly! You can substitute white chocolate chips with dark or milk chocolate chips to suit your taste preferences. Just adjust the amount of oil if necessary to keep the coating smooth and easy to dip.
What kind of edible glitter is safe to use?
Make sure to use food-grade edible glitter specifically labeled for consumption. Avoid craft glitters that are not designed to be eaten, as they can be harmful.
How long does it take to make this Glitter Cookie Balls Recipe?
From start to finish, including chilling and setting times, the recipe generally takes about an hour, but the actual hands-on prep time is quite manageable, perfect for a quick but impressive homemade treat.
Final Thoughts
Trust me when I say these Glitter Cookie Balls Recipe are pure magic on a plate. They’re simple to make but deliver so much joy, whether sparkling at a party or as a sweet surprise for a loved one. Give them a try—you’ll wonder how you ever lived without these little bites of glittery goodness!
Print
Glitter Cookie Balls Recipe
- Prep Time: 25 minutes
- Cook Time: 0 minutes
- Total Time: 1 hour
- Yield: 12 servings
- Category: Dessert
- Method: No-Cook
- Cuisine: American
Description
Delightfully festive Glitter Cookie Balls made from crushed cookies and cream cheese, coated in smooth melted white chocolate and decorated with shimmering edible glitter. These bite-sized treats are perfect for parties, gifts, or a special indulgence.
Ingredients
Cookie Mixture
- 2 cups crushed cookies (such as Oreos, vanilla wafer cookies, or shortbread cookies)
- 8 oz cream cheese, softened
- 1 tsp vanilla extract (optional)
Chocolate Coating
- 12 oz white chocolate chips (or milk chocolate, if preferred)
- 2 tbsp vegetable oil or coconut oil (to help with smooth coating)
Decoration
- Edible glitter or shimmer powder (for decoration)
Instructions
- Prepare the Cookie Mixture: In a large bowl, crush the cookies into fine crumbs using a food processor or by placing them in a sealed plastic bag and crushing with a rolling pin.
- Combine Ingredients: Add the softened cream cheese and vanilla extract (if using) to the crushed cookies and mix until well combined, forming a sticky and moldable mixture.
- Form Balls: Roll the cookie mixture into small, bite-sized balls about 1 inch in diameter and place them on a parchment-lined baking sheet.
- Chill Cookie Balls: Refrigerate the cookie balls for 20-30 minutes until firm and set, facilitating easier coating.
- Melt the Coating: Melt white chocolate chips with vegetable or coconut oil in a microwave-safe bowl, heating in 30-second intervals and stirring until smooth, or melt over a double boiler.
- Coat the Cookie Balls: Dip each chilled cookie ball into the melted chocolate using a fork or spoon, coat thoroughly, let excess drip off, then place back on parchment paper.
- Add the Glitter: While the chocolate coating is still wet, generously sprinkle edible glitter or shimmer powder over the cookie balls for a sparkling finish.
- Set the Coating: Refrigerate the coated cookie balls for another 15-20 minutes to allow the chocolate to harden completely.
- Serve: Once the chocolate is fully set, serve your Glitter Cookie Balls as a festive treat for parties, gifts, or personal enjoyment.
Notes
- For a richer flavor, try using different types of cookies such as mint Oreos or chocolate wafers.
- If you don’t have edible glitter, finely grated white chocolate can add a nice touch.
- Make sure cookies are crushed finely for easier mixing and smooth texture.
- Use a silicone spatula to gently mix cream cheese and crumbs without overworking the dough.
- Store leftovers in an airtight container in the refrigerator for up to one week.
