
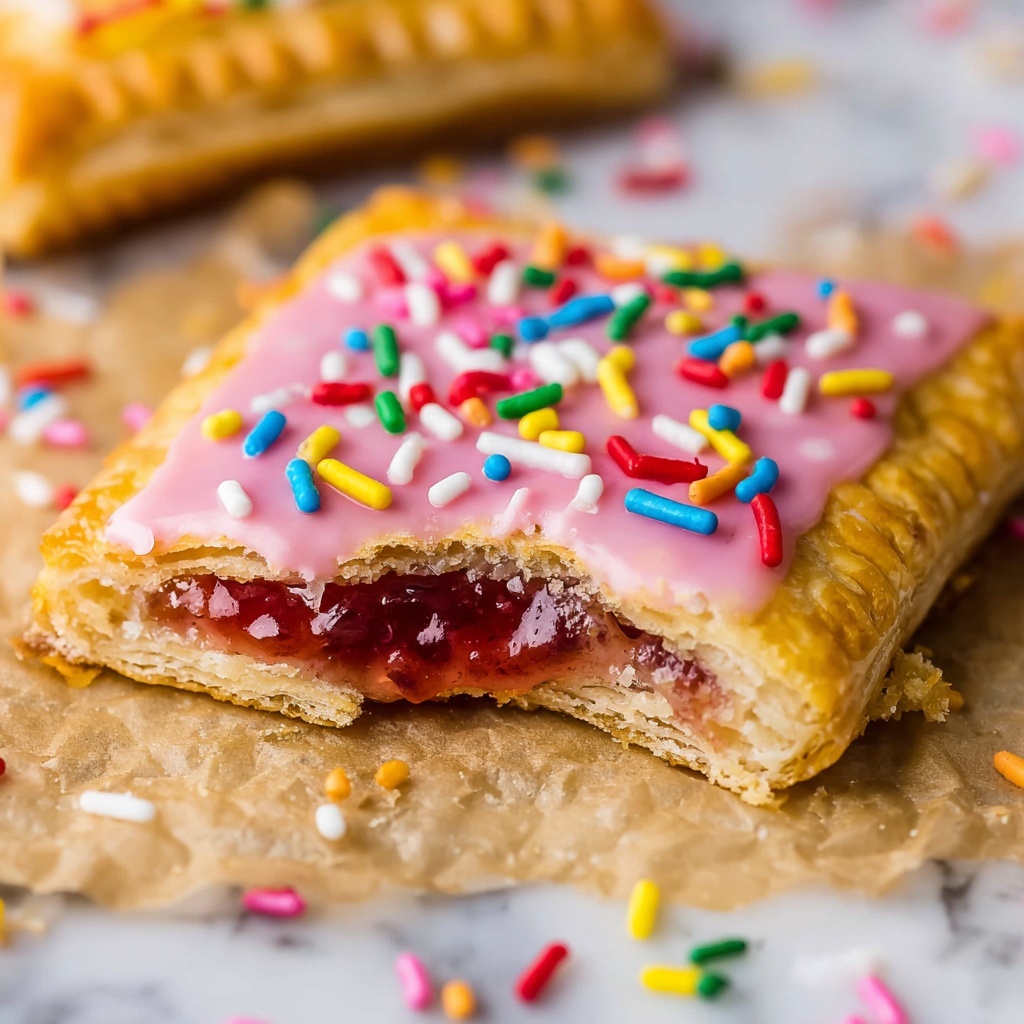
If you have a soft spot for nostalgic breakfasts or just love a sweet, flaky treat that’s bursting with fruit flavor, you are going to adore this Easy Homemade Pop Tarts with Jam and Icing Recipe. These delightful, scratch-made pastries take just a little effort and a handful of simple ingredients to transform your morning routine or snack time into something truly special. They come out perfectly golden, filled with luscious jam, and topped with a smooth, sweet icing that’s as fun to decorate as it is delicious to eat. Trust me, once you try making your own pop tarts, you’ll never want to go back to store-bought again!
Ingredients You’ll Need
To make these Easy Homemade Pop Tarts with Jam and Icing Recipe, you’ll only need a few straightforward ingredients that bring together flaky texture, fruity sweetness, and creamy topping. Each component plays a key role in delivering that perfect balance of crispy yet tender crust, luscious filling, and irresistible glaze.
- Rolled pie crust: Provides the flaky, buttery base that’s quick to work with and perfectly tender when baked.
- Jam or preserves: Your favorite flavor makes every pop tart uniquely delicious and fruity.
- Large egg: Used as an egg wash to give the crust that gorgeous golden shine and to seal the edges tightly.
- Powdered sugar: The foundation of the sweet, smooth icing that adds a lovely finishing touch.
- Milk or cream: Helps create a soft and spreadable glaze that melts perfectly over the warm tarts.
- Vanilla extract: Adds a hint of warmth and depth to the icing, rounding out the sweetness.
How to Make Easy Homemade Pop Tarts with Jam and Icing Recipe
Step 1: Prepare Your Baking Surface and Crust
Start by preheating your oven to 400°F. Line a baking sheet with parchment paper for easy clean-up and lay out your rolled pie crust on another parchment sheet. Use an index card or ruler to cut rectangles roughly 3 inches by 5 inches. Don’t worry if you have scraps — simply gather those, knead lightly, and roll out again to maximize your dough.
Step 2: Assemble the Pop Tarts
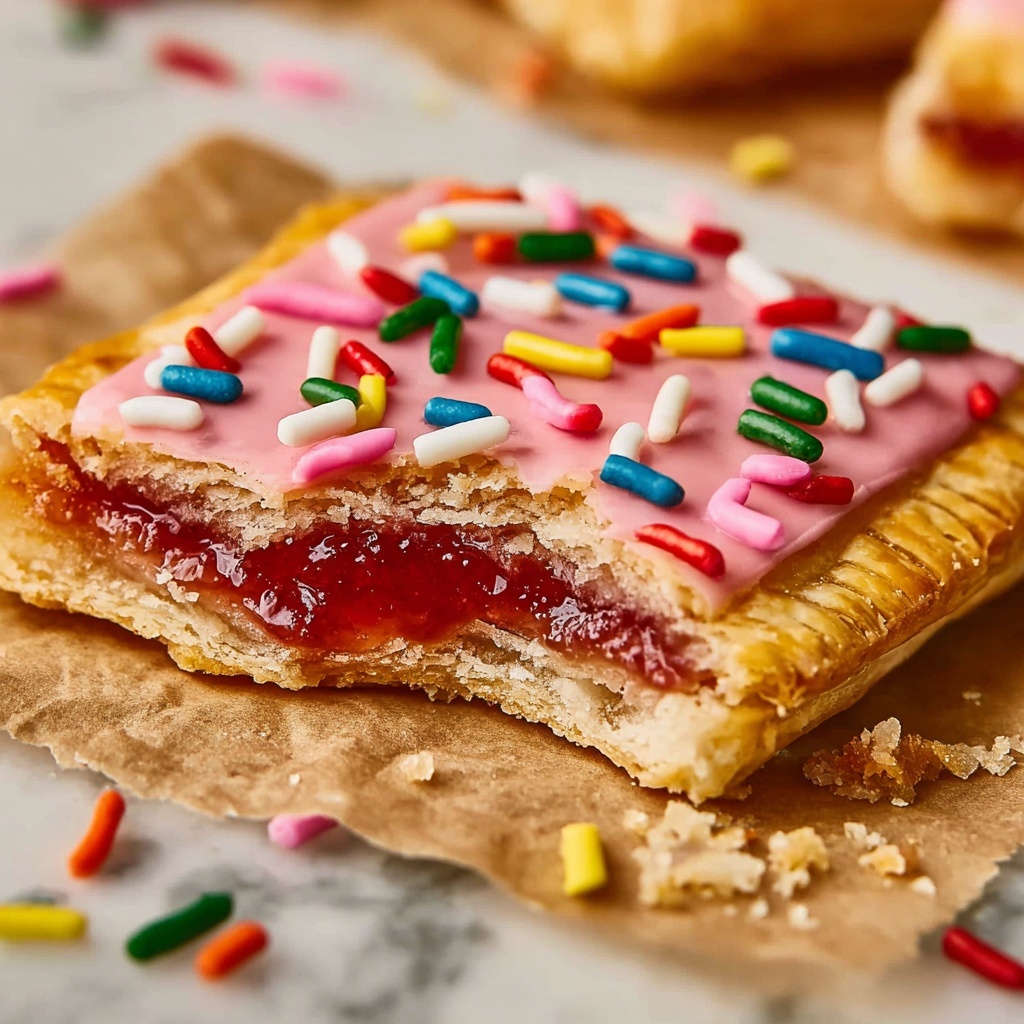
Beat your egg to create an egg wash that will help seal the edges and give your pop tarts a shiny finish. Arrange half of your rectangles on the parchment-lined baking sheet, then spoon about 1 ½ tablespoons of jam onto the center of each. Brush the edges of the rectangles gently with egg wash before placing the top rectangles over the jam. Press the edges together firmly and crimp with a fork to seal in that tasty filling. Don’t forget to poke a few holes in the top crust to vent steam.
Step 3: Bake Until Golden
Brush the entire surface of each pop tart with the egg wash one more time for that lovely golden sheen. Slide your baking sheet into the oven and bake the pop tarts for approximately 12 to 15 minutes. Keep an eye on them so they reach a beautiful golden brown without burning. Once done, remove from the oven and let them cool a bit.
Step 4: Prepare the Icing
While your pop tarts cool, whisk together powdered sugar, 2-3 tablespoons of milk or cream, 2 tablespoons of jam, and half a teaspoon of vanilla extract to create a silky icing. Adjust the milk or cream for your desired thickness — it should be drizzle-worthy but thick enough to stay put on top of your tarts.
Step 5: Ice and Decorate
Spread or drizzle the luscious icing over each cooled pop tart. This is where you can get creative — add sprinkles, crushed freeze-dried berries, or even edible rose petals for a beautiful, personal touch. Let the icing set briefly before enjoying your warm, homemade masterpiece.
How to Serve Easy Homemade Pop Tarts with Jam and Icing Recipe
Garnishes
Sprinkles add a festive crunch and pop of color that makes the pop tarts feel extra special, especially for kids. For a sophisticated twist, crushed freeze-dried berries or edible flower petals offer delicate bursts of flavor, texture, and visually stunning details.
Side Dishes
These pop tarts pair wonderfully with a cup of coffee or tea for a cozy breakfast or afternoon treat. For a more balanced meal, try serving alongside fresh fruit or yogurt for a fresh and creamy contrast.
Creative Ways to Present
Stack a few pop tarts on a pretty plate for a brunch centerpiece or arrange them with a small jar of your jam and a butter knife for a delightful DIY setup that invites friends and family to customize their own. You can even cut them into smaller bite-sized pieces to serve as party finger food.
Make Ahead and Storage
Storing Leftovers
If you have leftovers, store them in an airtight container to keep them fresh. They will stay delicious for up to two days, though these pop tarts truly shine when eaten fresh from the oven or the day they’re made.
Freezing
You can freeze baked pop tarts for longer storage. After they cool completely, wrap each tart in plastic wrap and place them in a freezer-safe container or bag. When ready to enjoy, thaw at room temperature or warm gently in the oven.
Reheating
Reheat leftover or thawed pop tarts in a toaster oven or regular oven at 350°F for 5-7 minutes to bring back their fresh-baked crispiness. Avoid microwaving if possible, as it can make the crust soggy.
FAQs
Can I use store-bought pie crust for this recipe?
Absolutely! Using rolled pie crust from the store is a huge timesaver and delivers fantastic flaky results, which makes this Easy Homemade Pop Tarts with Jam and Icing Recipe so simple and accessible.
What types of jam work best for homemade pop tarts?
Any jam or preserves you love will do the trick. Classic flavors like strawberry, raspberry, or blueberry are all hits, but feel free to get creative with apricot, peach, or even mixed berry blends.
How can I prevent the crust from getting soggy?
Make sure to pinch and crimp the edges well after adding the jam, and use the egg wash to seal it tightly. Poking ventilation holes on top allows steam to escape, helping the crust stay crisp during baking.
Can I make these pop tarts vegan or dairy-free?
With a few swaps, yes! Use a plant-based pie crust or make your own, substitute the egg wash with a little plant milk or oil for glazing, and choose a non-dairy milk for the icing. The jam is usually naturally vegan, but double-check the label just in case.
How long do these pop tarts keep their freshness?
They are best enjoyed fresh within a day or two. Stored in an airtight container, they will stay tasty for up to two days, after which the crust may lose some of its crispness.
Final Thoughts
If you’re looking to add a little homemade magic to your mornings or treat yourself to a nostalgic, delicious snack, this Easy Homemade Pop Tarts with Jam and Icing Recipe is a total winner. It’s straightforward, fun to make, and wonderfully customizable, so you can tweak it to fit whatever jam or decorative frosting vibe you’re feeling. Once you make these, you’ll see why they’re a beloved classic and why making them fresh at home quickly becomes a happy ritual!
Print
Easy Homemade Pop Tarts with Jam and Icing Recipe
- Prep Time: 15 minutes
- Cook Time: 15 minutes
- Total Time: 30 minutes
- Yield: 6 servings (approximately 8 pop tarts)
- Category: Breakfast
- Method: Baking
- Cuisine: American
Description
These Easy Homemade Pop Tarts with Pie Crust are a delightful and simple breakfast treat that you can customize with your favorite jam or preserves. Made with ready-to-use rolled pie crust, filled with luscious jam, baked until golden, and topped with a sweet glaze, they bring nostalgic flavors and homemade charm in under 40 minutes.
Ingredients
Base Ingredients
- 1 package rolled pie crust (2 count, 7.5 oz each)
- 1 cup plus 2 tablespoons jam or preserves (any flavor)
- 1 large egg (for egg wash)
Glaze Ingredients
- 1 cup powdered sugar
- 2–3 tablespoons milk or cream
- 2 tablespoons jam
- 1/2 teaspoon vanilla extract
Instructions
- Preheat oven: Preheat your oven to 400°F (204°C) to prepare for baking the pop tarts.
- Prepare crust rectangles: Lay a sheet of parchment paper on a baking sheet. Unroll the pie crust onto another sheet of parchment. Using a 3 inch by 5 inch guide (like an index card), cut as many rectangles as possible from the crust. Gather leftover dough, knead, and roll it out thinly (just under 1/4 inch) to cut additional rectangles.
- Assemble Pop Tarts: In a small bowl, beat the egg to create an egg wash. Place 8 rectangles on the parchment-lined baking sheet. Spoon about 1 1/2 tablespoons of jam onto each rectangle. Brush the edges with egg wash, then place another rectangle on top of each jam-covered one. Seal the edges by gently pinching and crimping with a fork. Pierce holes on the top to prevent puffing, then brush the entire top surface with egg wash.
- Bake: Bake the assembled pop tarts for 12-15 minutes until they turn a golden brown color and the crust is cooked through.
- Prepare glaze and finish: Once the pop tarts have cooled, whisk together powdered sugar, milk or cream, jam, and vanilla extract until smooth. Spread this glaze over each pop tart. Add optional toppings such as sprinkles, crushed freeze-dried berries, or edible rose petals for a decorative touch. Serve fresh or store in an airtight container for up to 2 days.
Notes
- Use any jam or preserves flavor to customize your pop tarts.
- If you don’t have an index card, use a ruler to measure 3×5 inch rectangles for consistent sizing.
- Crimping the edges well is important to prevent jam from leaking out during baking.
- The glaze adds sweetness and a shiny finish but can be omitted or substituted with a simple powdered sugar dusting.
- Pop tarts are best eaten fresh but can be stored airtight up to two days.


