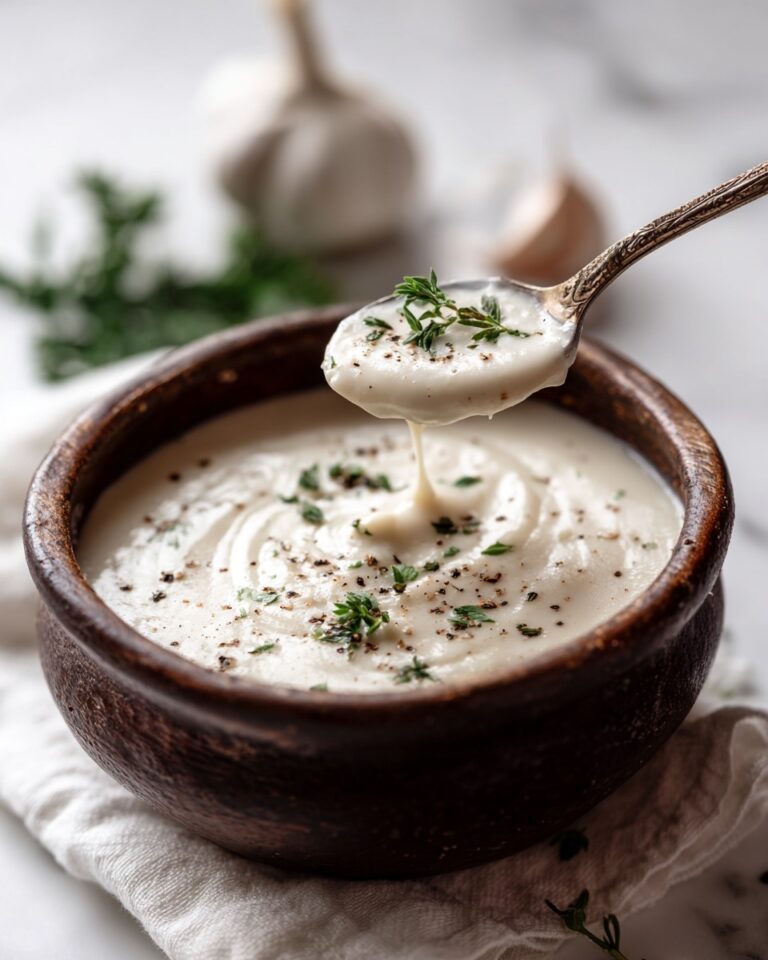
If you’re looking for a delightful, festive treat that perfectly captures the spirit of the season, this Christmas Peppermint Mints Recipe is exactly what you need. These colorful, melt-in-your-mouth mints bring together creamy, buttery softness with a refreshing peppermint zing in every bite. They are as fun to make as they are to enjoy, with vibrant red, green, and white layers that literally scream holiday cheer. Whether you’re gifting them, sharing at a party, or sneaking one (or ten) yourself, this recipe will quickly become a beloved tradition.
Ingredients You’ll Need
The beauty of this Christmas Peppermint Mints Recipe is how few, simple ingredients come together to create something so magical. Each component plays a crucial role in flavor, texture, and festive color, ensuring every mint is a perfect bite of holiday joy.
- Granulated sugar: Adds the essential sweet crunch and coating that balances the creamy centers.
- Cream cheese, room temperature: Creates the smooth, creamy base that melts in your mouth.
- Unsalted butter, room temperature: Brings richness and tenderness to the mints’ texture.
- Light/clear corn syrup: Helps bind ingredients and gives a slight chewiness.
- Peppermint extract: Delivers that unmistakable holiday coolness and brightness.
- Powdered sugar: Ensures perfect sweetness and helps form the dough’s structure.
- Green liquid food coloring: Provides the classic Christmas green vibrance.
- Red liquid food coloring: Adds festive red, making the mints truly pop.
How to Make Christmas Peppermint Mints Recipe
Step 1: Prepare the Workspace
Before you start the fun parts, line a large rimmed baking tray with parchment paper—this will keep your mints from sticking and makes cleanup a breeze. Also, place your granulated sugar in a small bowl nearby for the coating step later. Having everything ready upfront makes the process smooth and enjoyable.
Step 2: Mix the Base Ingredients
In a large mixing bowl, take 4 ounces of room temperature cream cheese, 2 tablespoons of unsalted butter at room temperature, 2 tablespoons of light or clear corn syrup, and 1 teaspoon of peppermint extract. Using a handheld mixer on low speed, blend everything together for about a minute until it’s creamy and smooth. This rich, flavorful base is where the magic begins.
Step 3: Incorporate the Powdered Sugar
Slowly add 4 1/4 cups of powdered sugar into the bowl, half a cup at a time, while continuing to mix on low. As the dough thickens and gets too dense for your mixer, switch to a spatula or wooden spoon to fold in the remaining sugar by hand. This slow incorporation guarantees the perfect texture without a grainy bite.
Step 4: Knead the Dough
Turn the dough onto a piece of parchment paper that’s been sprinkled with 1/4 cup of powdered sugar. Divide the dough evenly into three parts. You’re about to bring in the joyful colors that make this Christmas Peppermint Mints Recipe so special!
Step 5: Color the Dough
Make a small well in two of the dough portions. Add 6 drops of red food coloring to one, and 6 drops of green food coloring to the other, leaving the third portion plain white. Knead each piece thoroughly until the color is evenly distributed. If the dough becomes sticky from the coloring, dust with more powdered sugar bit by bit until it reaches a handleable consistency. The colors should be bold yet creamy, ready for shaping.
Step 6: Form the Ropes
Roll each colored dough ball into an 18-inch long rope, about 1 inch thick. This part feels a bit like playtime, and seeing your festive colors come together this way always brings a smile.
Step 7: Slice and Shape the Mints
Cut the ropes into 1/2-inch slices. Then, take each slice and roll it gently between your palms to form small, smooth balls. This step shapes each mint and sets them up for their signature coating.
Step 8: Coat with Sugar and Press
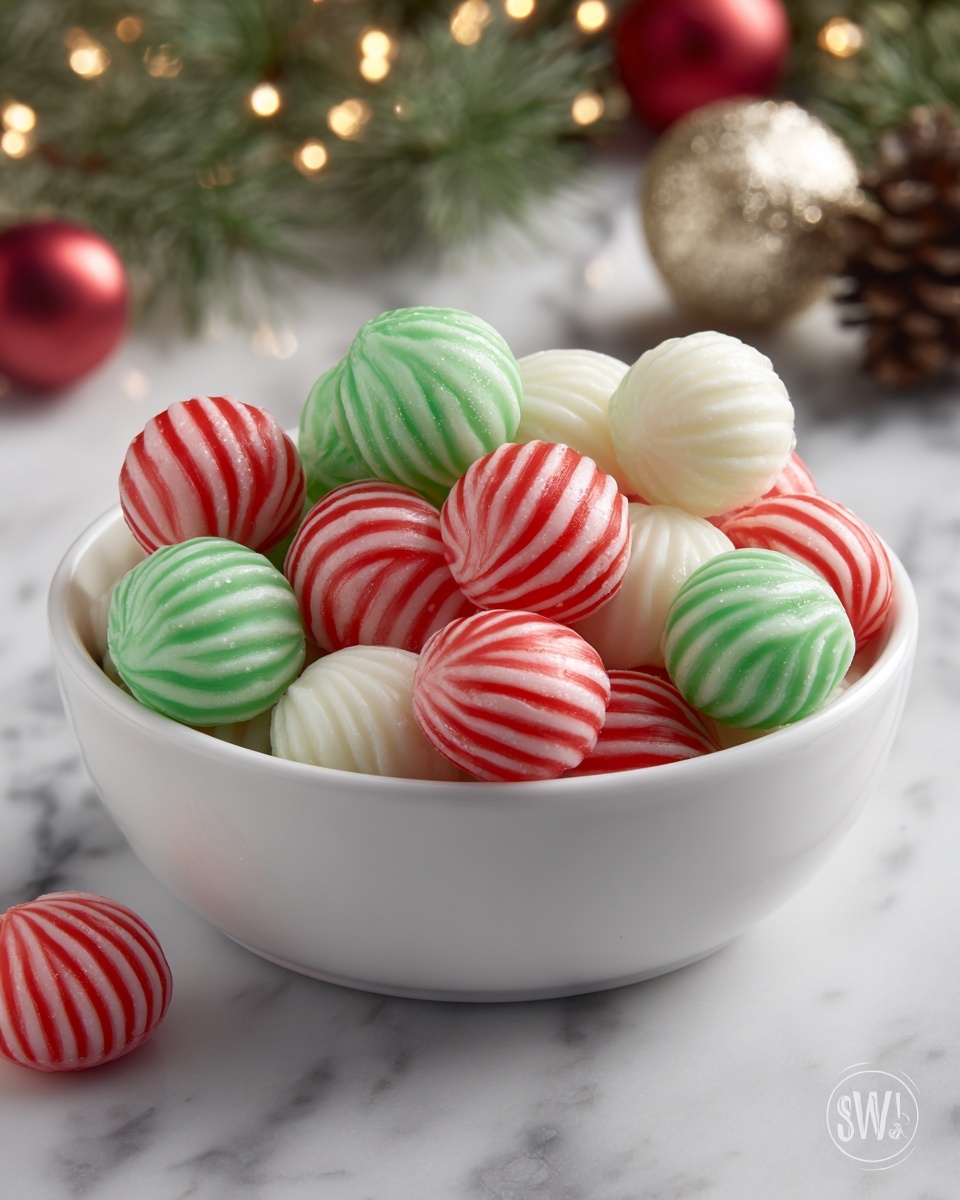
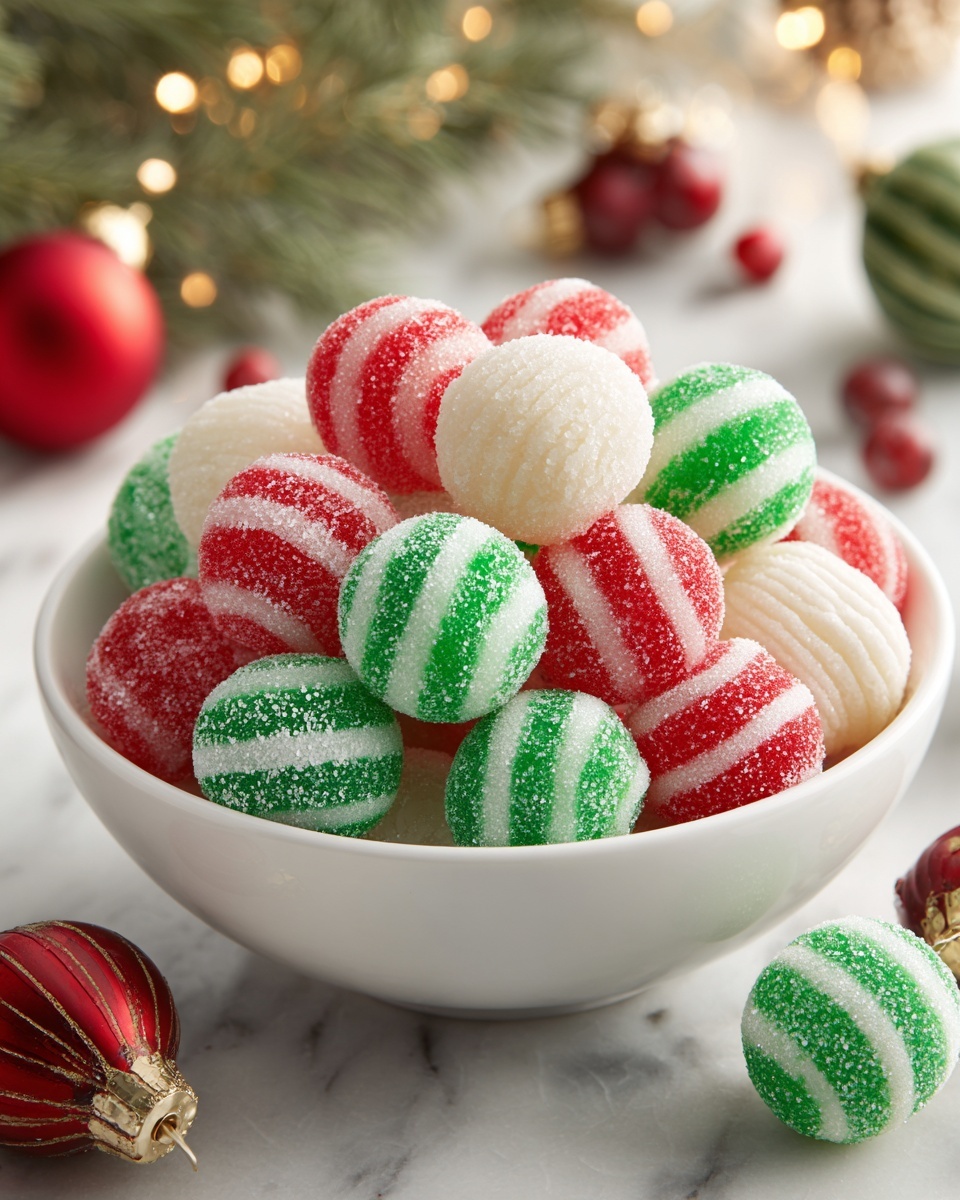
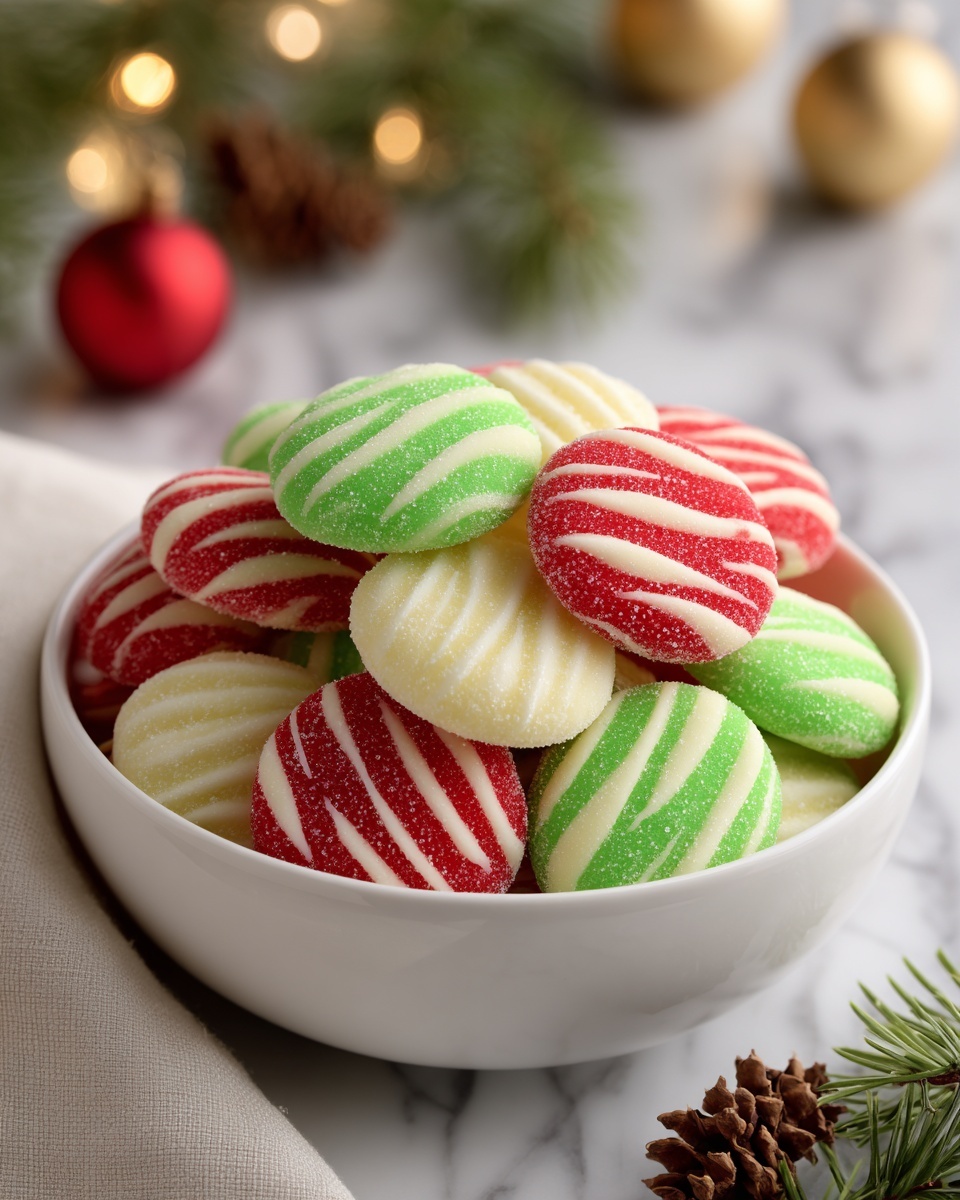
Drop 2 to 3 dough balls into your bowl of granulated sugar and toss to coat them completely. Place the sugared balls onto your lined baking tray. Using the tip of a fork, gently press each ball down to flatten them into a disc. This pressing creates a charming striped pattern that’s both pretty and iconic for Christmas mints.
Step 9: Dry the Mints
Let the mints rest at room temperature on the tray for up to 24 hours. This drying time allows them to set and develop the perfect bite—slightly firm outer layer with a soft, peppermint-infused center. Patience here is rewarded with pure holiday bliss.
How to Serve Christmas Peppermint Mints Recipe
Garnishes
Serve these mints on a festive plate with a sprinkle of extra granulated sugar or crushed candy canes around them for a beautiful holiday touch. A sprig of fresh mint or a dusting of edible glitter can also elevate their presentation, making them look as cheerful as they taste.
Side Dishes
Christmas mints are a perfect palate cleanser after rich holiday meals. Pair them with hot cocoa, eggnog, or a cup of peppermint tea for a delightful dessert experience. They also complement holiday cookie trays, adding a refreshing contrast to buttery cookies and dense cakes.
Creative Ways to Present
Bundle these mints in small glass jars tied with red and green ribbons for charming gifts. You can also arrange them in decorative holiday tins or use them to top cupcakes and cakes for a festive, flavorful accent. The vibrant colors and sweet peppermint flavor make these mints a versatile and adored addition to any celebration.
Make Ahead and Storage
Storing Leftovers
Keep leftover Christmas peppermint mints in an airtight container at room temperature. They stay fresh and flavorful for up to two weeks. Avoid refrigeration, as it can dry them out, but storing them away from heat and humidity will keep their delightful texture.
Freezing
You can freeze the mints for longer storage by placing them in a single layer on a baking sheet first, then transferring them to a freezer-safe container once solid. Freeze for up to three months. When you’re ready to enjoy, simply thaw them at room temperature for about 30 minutes—you’ll have fresh mints ready in no time.
Reheating
These mints are best enjoyed as-is and typically do not need reheating. If you prefer them slightly softer, let them warm at room temperature for a short while. Avoid microwaving, as the texture may change adversely.
FAQs
Can I use any type of food coloring for the Christmas Peppermint Mints Recipe?
Yes, liquid food coloring works well for this recipe because it mixes easily into the dough. Gel food coloring can also be used but add it sparingly as it’s more concentrated and could alter the dough’s consistency.
What if I don’t have cream cheese at room temperature?
To quickly bring cream cheese to room temperature, cut it into small cubes and let it sit on the counter for 15 to 20 minutes. This helps create a smooth mixture without lumps in your mints.
Is it possible to make these mints without corn syrup?
Corn syrup adds chewiness and helps bind ingredients, but you can substitute with honey or glucose syrup. Keep in mind it might slightly affect the texture and flavor, so test with a small batch first.
How long will these Christmas Peppermint Mints keep their freshness?
Stored properly in an airtight container away from heat, the mints stay fresh for about two weeks. Their flavor might mellow slightly over time, but they remain delicious even after a few days.
Can these mints be made vegan or dairy-free?
Unfortunately, cream cheese and butter are key to the creamy texture here, so this particular Christmas Peppermint Mints Recipe is not easily adapted to be vegan. However, experimenting with vegan cream cheese and butter substitutes may work if you’re willing to test the texture.
Final Thoughts
This Christmas Peppermint Mints Recipe is a true holiday gem that brings joy not only on your taste buds but also in the fun of making them. The bright colors, creamy texture, and festive peppermint flavor make these mints a must-have for your seasonal celebrations. So grab your ingredients, roll up your sleeves, and create some sweet Christmas magic that’s sure to become a treasured tradition year after year.
Print
Christmas Peppermint Mints Recipe
- Prep Time: 20 minutes
- Cook Time: 0 minutes
- Total Time: 24 hours 20 minutes (includes drying time)
- Yield: 100 mints
- Category: Candy
- Method: No-Cook
- Cuisine: American
- Diet: Vegetarian
Description
These Christmas Mints are festive, colorful, and perfectly sweet treats ideal for holiday gatherings. Creamy and smooth with a refreshing peppermint flavor, these mints are hand-rolled, colored, and coated in sugar, making them both decorative and delicious. The recipe yields 100 bite-sized mints, making it perfect for large parties and gift-giving.
Ingredients
Base Ingredients
- 1/3 cup granulated sugar
- 4 ounces cream cheese, room temperature
- 2 tablespoons unsalted butter, room temperature
- 2 tablespoons light/clear corn syrup (such as Karo)
- 1 teaspoon peppermint extract
Powdered Sugar and Coloring
- 4 1/4 – 5 cups powdered sugar, divided
- 6 drops green liquid food coloring
- 6 drops red liquid food coloring
Instructions
- Prepare the Workspace: Line a large rimmed baking tray with parchment paper to prevent sticking. Place the granulated sugar into a small bowl and set aside for coating the mints later.
- Mix the Base Ingredients: In a large mixing bowl, use a handheld mixer on low speed to beat together the cream cheese, unsalted butter, corn syrup, and peppermint extract for about 1 minute until the mixture is smooth and creamy.
- Incorporate the Powdered Sugar: Slowly add 4 1/4 cups of powdered sugar, 1/2 cup at a time, to the cream cheese mixture while keeping the mixer on low speed. Once the dough becomes too thick to mix with the mixer, switch to a spatula or wooden spoon to finish mixing by hand.
- Knead the Dough: Sprinkle a piece of parchment paper with 1/4 cup powdered sugar and turn the dough onto it. Divide the dough evenly into three equal parts for coloring.
- Color the Dough: Create a shallow well in two portions of dough; add red food coloring to one and green food coloring to the other, leaving the third portion plain white. Knead each dough ball carefully to distribute the color evenly, adding up to an additional 1/4 cup powdered sugar if the dough becomes too sticky.
- Form the Ropes: Roll each colored dough ball into an 18-inch long rope about 1 inch thick, preparing them for cutting.
- Slice and Shape the Mints: Cut each dough rope into 1/2-inch slices, then roll each piece between your palms to form small balls.
- Coat with Sugar: Drop 2-3 dough balls at a time into the bowl of granulated sugar and toss to ensure they are evenly coated. Place the coated balls onto the lined baking tray.
- Press into Discs: Using the tip of a fork, gently press each coated dough ball to flatten it into a disc, creating a striped pattern on top for a decorative touch.
- Dry the Mints: Allow the shaped mints to sit at room temperature on the tray for up to 24 hours. This setting time lets the mints firm up and dry before serving or packaging.
Notes
- If the dough is too sticky after adding food coloring, gradually add more powdered sugar to achieve a workable consistency.
- Use room temperature cream cheese and butter for easy mixing to avoid lumps in the dough.
- Store the finished mints in an airtight container at room temperature for up to 2 weeks.
- For a stronger peppermint flavor, adjust peppermint extract to taste but do so gradually to avoid overpowering.
- You can substitute liquid food coloring with gel food coloring if preferred; use fewer drops as gels are more concentrated.

