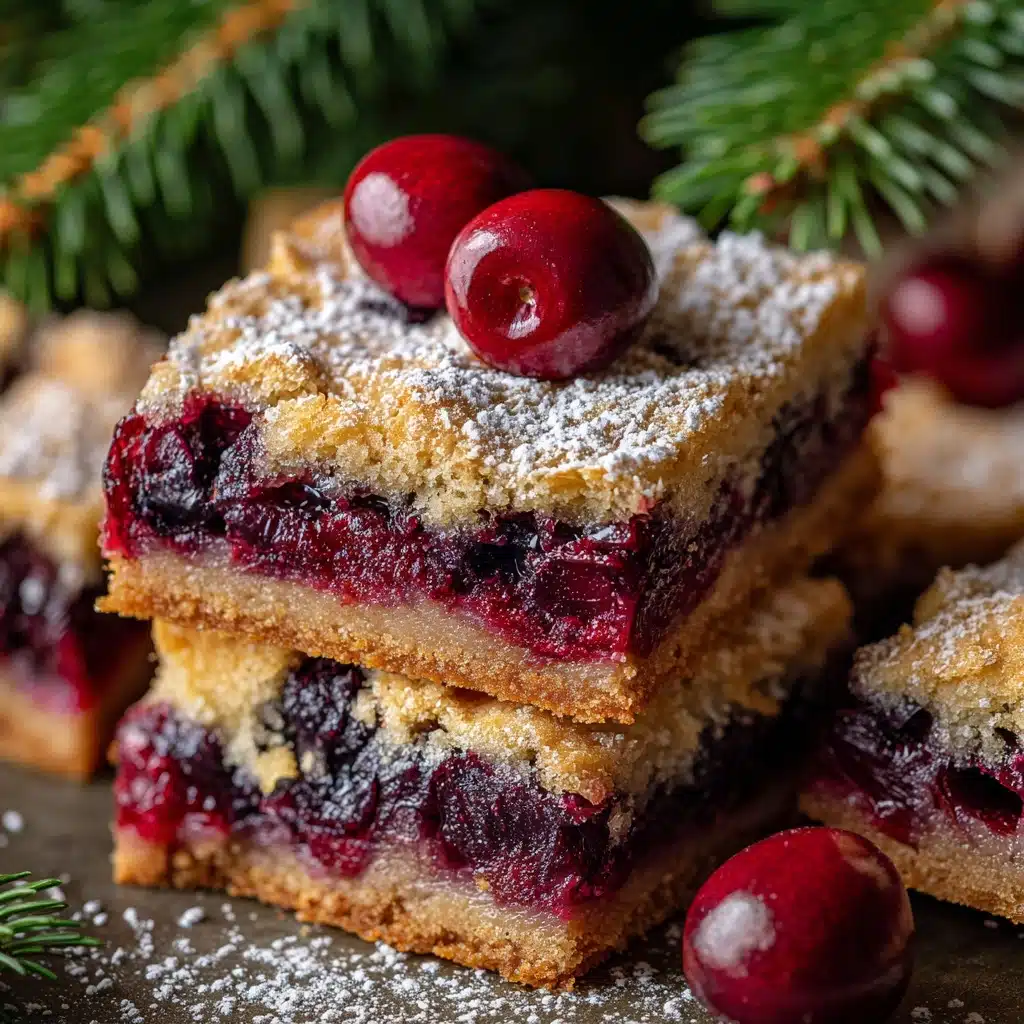
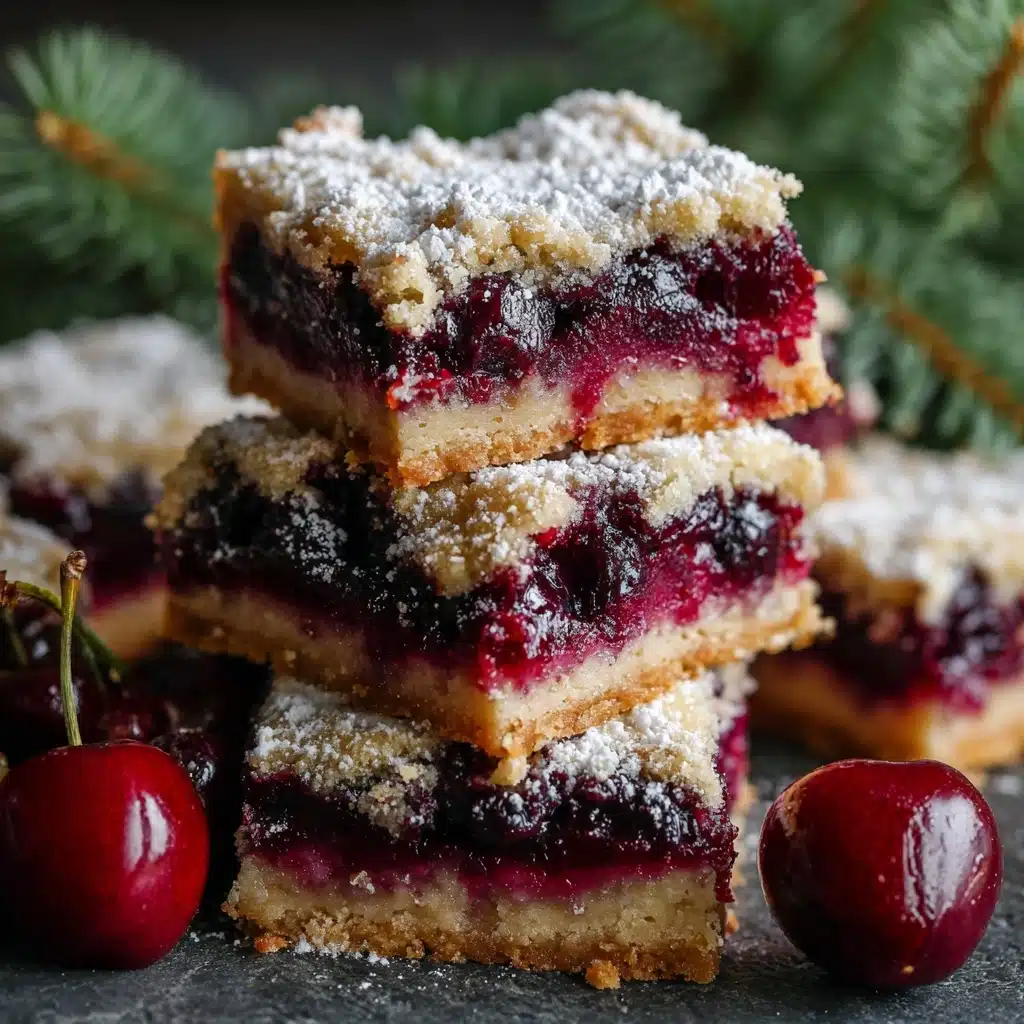
If you’re searching for a festive dessert that practically sparkles with holiday cheer, these Christmas Cherry Bars are an absolute must-bake. Imagine layers of buttery, tender dough, ruby-red cherries, and a sweet glaze, all coming together in a bar that’s as stunning on the platter as it is irresistible to eat. Whether for a cookie exchange, family gathering, or simply to brighten a wintry afternoon, these bars combine classic holiday flavors with a playful pop of color. They’re sure to bring smiles — and second helpings — every single time.
Ingredients You’ll Need
The magic of Christmas Cherry Bars lies in their straightforward ingredients, each one chosen for the perfect blend of comfort, texture, and festive look. Let’s talk about why you’ll want every single bowl and spoon ready!
- Unsalted butter (1 cup, softened): Gives that melt-in-your-mouth richness and helps the bars bake up tender.
- Granulated sugar (1½ cups): Provides just the right level of sweetness to balance the tart cherries.
- Large eggs (4): Bind everything together and add a delicate lightness to the crumb.
- Vanilla extract (1 teaspoon): A classic flavor enhancer that cozies up all the other ingredients.
- All-purpose flour (2¼ cups): The backbone of your batter, giving sturdy structure to those luscious layers.
- Baking powder (½ teaspoon): Adds a little lift for a light, cake-like texture.
- Salt (½ teaspoon): Brings out both the sweetness in the fruit and the depth of the butter.
- Cherry pie filling (1 21oz can): The star of the show—vivid, juicy, and joyfully tart.
- Chopped walnuts or pecans (½ cup, optional): Add some crunch and a hint of toasty flavor, making each bite interesting.
- Powdered sugar (1 cup, for glaze, optional): Creates a snow-like finish that’s both pretty and delicious.
- Milk (2–3 tablespoons, for glaze): Just enough to thin the glaze to drizzle-able perfection.
- Almond or vanilla extract (¼ teaspoon, for glaze): Almond brings extra holiday flair; vanilla keeps it comforting.
How to Make Christmas Cherry Bars
Step 1: Prep Your Pan and Oven
Start by preheating your oven to 350°F (175°C) and either greasing a 9×13-inch baking pan or lining it with parchment paper. This simple step means easy bar removal later and picture-perfect squares.
Step 2: Cream the Butter and Sugar
In a large mixing bowl, beat together the softened butter and granulated sugar until it’s pale and fluffy—about 2-3 minutes. This is where the magic starts: creaming allows air into the batter, setting up those light, tender bars we love.
Step 3: Add Eggs and Vanilla
Beat in the eggs one at a time, making sure each one is fully incorporated before adding the next. Then stir in the vanilla extract. The batter should look silky and thick—don’t skip scraping down the sides for even mixing!
Step 4: Combine Dry Ingredients
In a separate bowl, whisk together the flour, baking powder, and salt. Add these dry ingredients gradually to your wet mixture, mixing just until combined. Overmixing isn’t your friend here; you want a gentle hand for the softest bars.
Step 5: Layer the Batter and Cherry Pie Filling
Spread about two-thirds of the batter evenly into your prepared pan. Dollop and gently spread the cherry pie filling across this base layer, making sure every bite gets its fair share of fruit. Drop spoonfuls of the remaining batter over top – you don’t need full coverage; a patchwork looks rustic and beautiful.
Step 6: Sprinkle with Nuts (Optional)
If you’re a fan of extra texture, now’s the time to sprinkle those chopped walnuts or pecans. They’ll toast up as the bars bake, adding irresistible crunch and color.
Step 7: Bake and Cool
Pop the pan into the oven and bake for 35–40 minutes. Watch for a lightly golden top and a toothpick that comes out mostly clean from the center. Let the Christmas Cherry Bars cool completely in the pan—this is key for easy slicing.
Step 8: Whisk and Drizzle the Glaze
If you’re glazing, whisk together the powdered sugar, milk, and your favorite extract until smooth. Drizzle over the cooled bars in thick zigzags or delicate lines, then let the glaze set before cutting.
How to Serve Christmas Cherry Bars
Garnishes
A finishing flourish makes your bars go from tasty to showstopping. Try a dusting of powdered sugar for that “fresh snow” look, a few extra chopped nuts sprinkled on top, or even some festive sprinkles if you’re feeling playful. Each detail adds a pop of holiday spirit.
Side Dishes
Serve Christmas Cherry Bars alongside a mug of hot cocoa, mulled cider, or steamy coffee for a classic treat. If you want to offer a dessert buffet, these bars fit beautifully next to other cookies or a big bowl of vanilla bean ice cream—the tart cherries play well with creamy flavors!
Creative Ways to Present
For special gatherings, slice the bars into triangles or diamonds and stack them on a tiered cake stand. Mini cupcake liners make them easy to pass at a party. Or try wrapping a few bars in cellophane with a festive ribbon for the sweetest homemade gift.
Make Ahead and Storage
Storing Leftovers
Keep any leftover Christmas Cherry Bars in an airtight container at room temperature for up to 3 days. They stay moist and flavorful, making them perfect for snacking throughout the week or packing into lunchboxes for a festive treat.
Freezing
These bars are freezer-friendly magic! Once fully cooled (and before glazing, if possible), wrap them tightly in plastic wrap and then foil, or place in a freezer-safe container. They’ll keep for up to 2 months. Thaw overnight in the fridge before serving, then add fresh glaze for best results.
Reheating
If you prefer your bars a little warm, pop individual pieces in the microwave for 10–15 seconds. The cherry filling gets extra gooey, while the glaze softens just enough to feel like it was made fresh today. Absolute cozy bliss!
FAQs
Can I use homemade cherry pie filling?
Absolutely! Homemade cherry pie filling adds a fresh flavor and lets you control the sweetness. Just be sure it’s cooled before layering so it doesn’t thin the batter too much. Enjoy experimenting!
Do I have to include nuts?
Nope—the nuts are completely optional. If allergies are a concern or you just aren’t a fan, leave them out. The bars will still be delightful and tender without them.
How do I make the bars more festive?
Try swapping out the vanilla for almond extract in either the batter or the glaze, or add some red and green sprinkles on top. Extra glaze drizzle or a light dusting of edible glitter also add holiday sparkle.
Can I double this recipe?
Yes! Simply double all the ingredients and bake in two pans or use a large sheet pan. Keep an eye on baking time, as thicker layers may need a few extra minutes to set.
Do Christmas Cherry Bars travel well?
They sure do. Once the glaze has set, stack them between layers of wax paper or parchment in a sturdy container, and they’re road-trip ready for parties, potlucks, or gift giving.
Final Thoughts
There’s something undeniably heartwarming about whipping up a batch of Christmas Cherry Bars: the colors, the aroma, the anticipation of that first bite. Whether you’re baking for a holiday gathering, a cookie swap, or just because, these bars promise to be a festive, flavor-packed hit. Gather your ingredients and share the cheer—these bars are waiting to become your new holiday tradition!