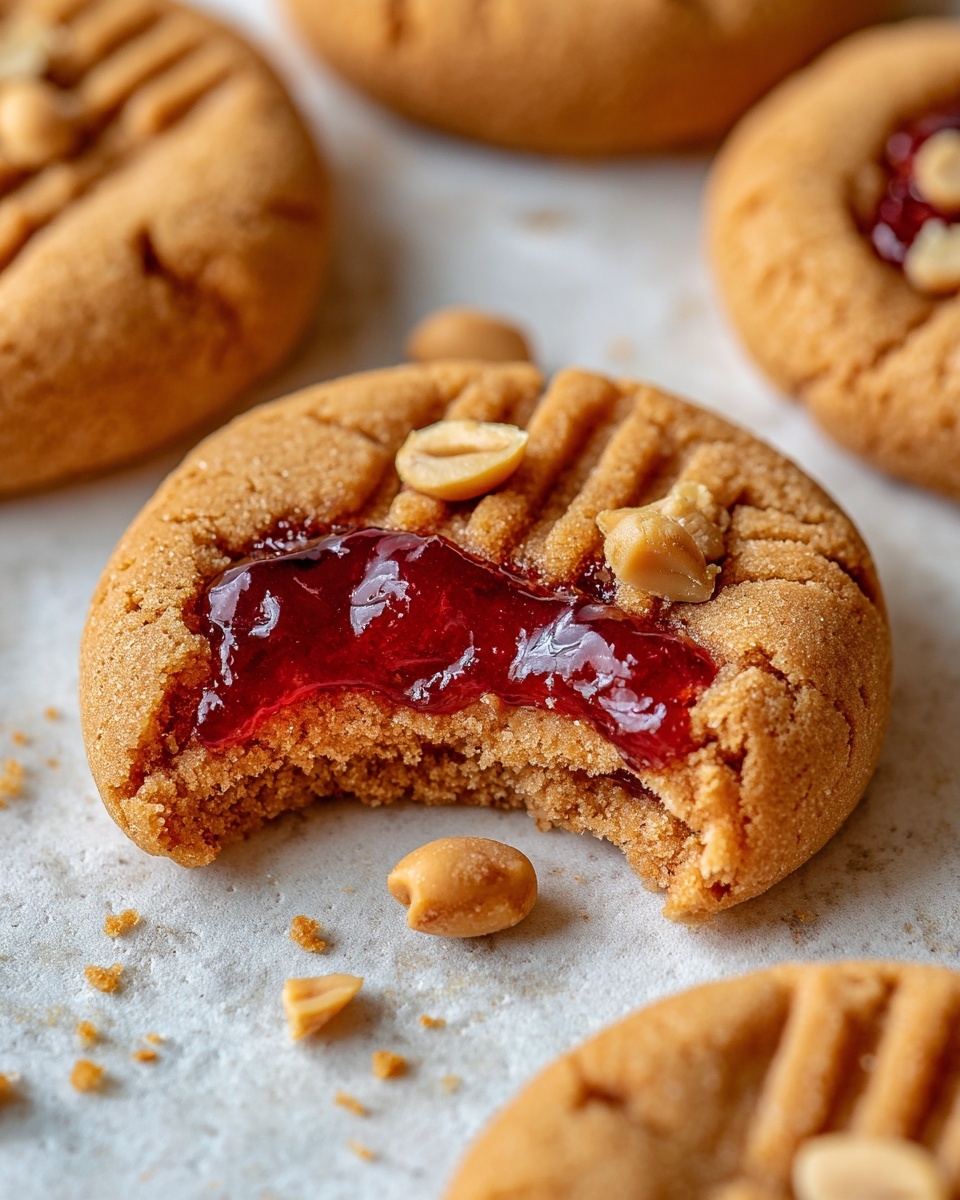
If you have a soft spot for classic childhood flavors, you are going to adore this Peanut Butter and Jelly Cookies Recipe. It takes the nostalgic combo of peanut butter and fruity jelly and transforms it into a warm, chewy cookie that feels like a hug in dessert form. Imagine biting into a perfectly baked cookie with a crisp edge, a tender center, and a luscious dollop of jam that bursts with sweetness. This recipe is an effortless way to bring smiles to any gathering or just to treat yourself to a comforting snack. Whether you’re a peanut butter lover or a jam enthusiast, these cookies promise to become an instant favorite in your baking repertoire.
Ingredients You’ll Need
These ingredients are wonderfully simple but absolutely essential for achieving the perfect taste and texture in your Peanut Butter and Jelly Cookies Recipe. Each one plays a vital role—from the creamy peanut butter that gives rich flavor and moisture to the jelly that adds a vibrant pop of color and sweetness.
- 1 cup creamy peanut butter: Choose a smooth variety for the best cookie texture and easy mixing.
- 1 cup granulated sugar: Provides the right balance of sweetness and helps create that slightly crunchy exterior.
- 1 large egg: Acts as a binder and gives the cookies structure and softness.
- 1 teaspoon vanilla extract: Enhances the overall flavor with a warm, aromatic note.
- 1/2 teaspoon baking soda: Helps the cookies rise lightly and develop a tender crumb.
- 1/4 teaspoon salt: Balances the sweetness and intensifies the peanut butter flavor.
- 1/4 cup fruit jelly or jam: Use your favorite flavor for a personalized touch—strawberry, grape, or raspberry work beautifully.
How to Make Peanut Butter and Jelly Cookies Recipe
Step 1: Preheat the Oven and Prepare Your Baking Sheet
Begin by preheating your oven to 350°F (175°C). Line a baking sheet with parchment paper or a silicone baking mat to prevent the cookies from sticking and to help them bake evenly. This simple setup makes cleanup a breeze and ensures your cookies come out perfectly every time.
Step 2: Mix Your Dough
In a large bowl, combine the creamy peanut butter, granulated sugar, egg, vanilla extract, baking soda, and salt. Stir everything together until the dough is smooth and fully combined. Don’t worry if the dough looks thick and sticky—that’s exactly how it should be. This mixture is packed with flavor and is the foundation of your cookie’s chewy texture.
Step 3: Shape the Cookies
Using a tablespoon, scoop out portions of the dough and roll them into balls. Place these dough balls on your prepared baking sheet, leaving about 2 inches of space in between so they have room to spread slightly. This step sets the stage for that perfect cookie size and shape you’ll love biting into.
Step 4: Make a Well for the Jam
Take the back of a spoon or a fork and gently press the center of each dough ball, creating a small well. This little nook is where your jelly or jam will sit, giving the cookie its signature look and the delicious fruity surprise inside. It’s an easy way to add flair and flavor in one step.
Step 5: Add the Jelly or Jam
Carefully spoon about 1/2 teaspoon of your chosen jelly or jam into the well you just created in each cookie. Be cautious not to overfill because the jelly can bubble over when baking, but do make sure there’s enough so every bite has that luscious burst of fruit. This step is where your cookies start to sparkle with color and sweetness.
Step 6: Bake to Golden Perfection
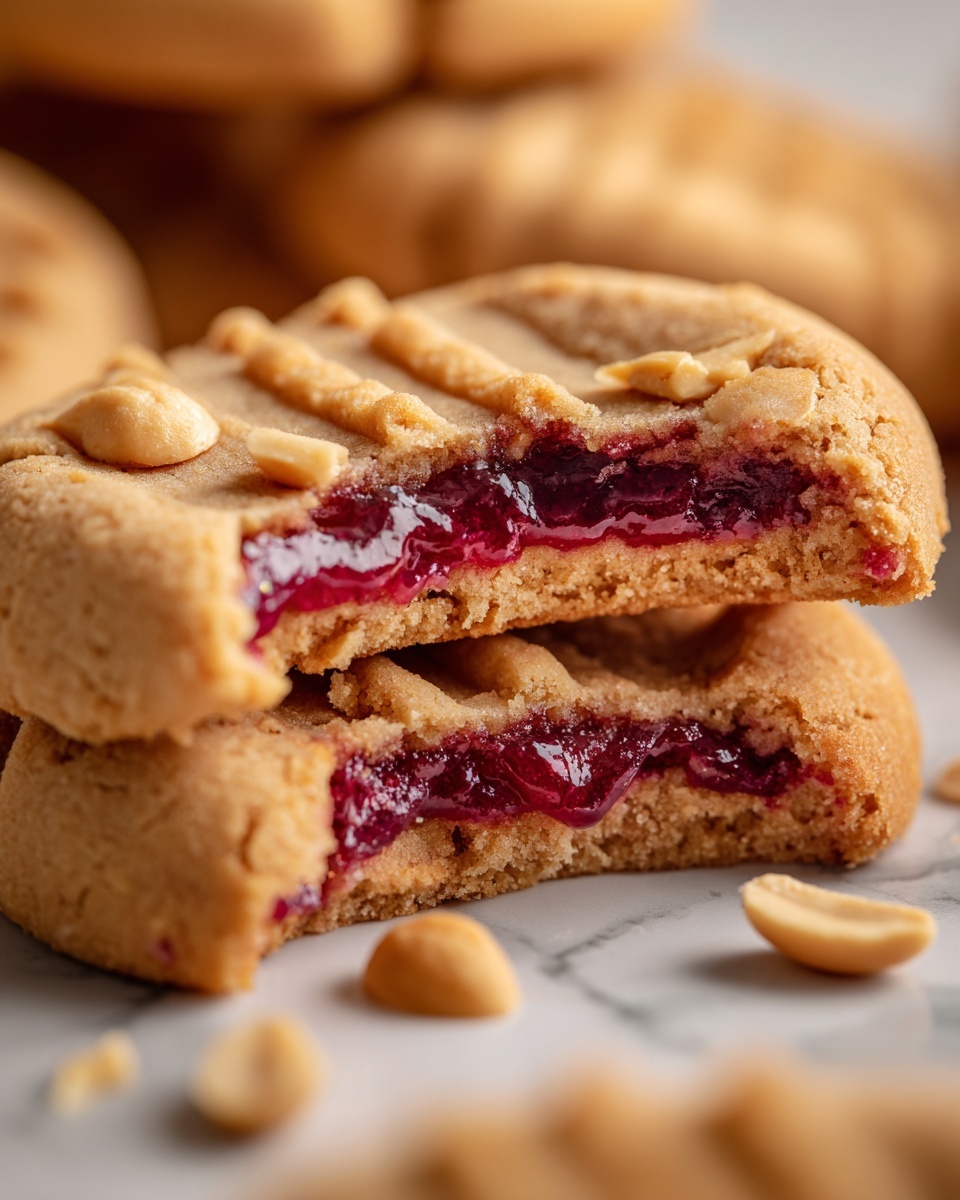
Place the cookies in the oven and bake for 8 to 10 minutes. You’ll know they’re ready when the edges turn a lovely golden brown. Though the cookies may seem a bit soft at first, they will firm up once cooled, giving you that perfect balance of crisp and chewy with a gooey jam center.
Step 7: Cool Before Enjoying
Allow the cookies to cool on the baking sheet for about 5 minutes to set gently before transferring them to a wire rack to cool completely. This cooling step is key to preventing breakage and ensuring your cookies hold their shape while locking in all that peanut butter and jelly goodness.
How to Serve Peanut Butter and Jelly Cookies Recipe
Garnishes
A simple dusting of powdered sugar can add a touch of elegance and sweetness without overpowering the cookies. Alternatively, a light drizzle of melted chocolate or a sprinkle of crushed peanuts can offer texture and visual appeal that makes these cookies even more irresistible.
Side Dishes
Serve these cookies alongside a cold glass of milk or a warm cup of tea or coffee. The classic combination of peanut butter, jelly, and a creamy beverage always hits the spot, turning a snack into a cozy mini moment of bliss. You can also pair them with fresh fruit to enhance the fruity notes in the jelly.
Creative Ways to Present
Try stacking the cookies in a decorative jar for a charming gift or display them on a rustic wooden platter alongside fresh berries to highlight the jam flavors. For parties, create an interactive cookie bar where guests can add their own jelly dollops or sprinkle toppings like mini chocolate chips or toasted coconut.
Make Ahead and Storage
Storing Leftovers
Once cooled completely, store your Peanut Butter and Jelly Cookies in an airtight container at room temperature. They stay fresh and chewy for up to 5 days, making them perfect for prepping ahead of time or enjoying over several days. Make sure to layer them with parchment paper to avoid sticking.
Freezing
You can freeze the dough in balls before baking or freeze the fully baked cookies. For dough, place the balls on a tray to freeze individually and then transfer them to a freezer bag. Bake from frozen, adding a couple of extra minutes to the baking time. For baked cookies, wrap them tightly and they’ll keep well in the freezer for up to 3 months.
Reheating
To refresh frozen or stored cookies, heat them gently in a microwave for about 10-15 seconds or warm them in a preheated oven at 300°F (150°C) for 5 minutes. This quick step revives their softness and melts the jelly delicately, making you feel like you just baked them fresh.
FAQs
Can I use natural peanut butter for this recipe?
Yes, you can use natural peanut butter, but note that it has a higher oil content and a thinner consistency, which may slightly change the texture of your cookies. Stir well before measuring to incorporate the oils evenly for best results.
What types of jelly or jam work best for Peanut Butter and Jelly Cookies Recipe?
Fruit jellies or jams that are not too runny work best to avoid oozing during baking. Strawberry, grape, and raspberry are classic choices, but feel free to experiment with flavors like apricot or blueberry for a unique twist.
Can I make these cookies gluten-free?
Since this recipe contains no flour, it is naturally gluten-free, making it a fantastic option for those avoiding gluten. Just make sure your baking soda and other ingredients are certified gluten-free if cross-contamination is a concern.
How do I prevent the jelly from spilling over during baking?
To avoid spills, create a well in the dough large enough to hold the jam but not too deep. Use just a small amount of jelly—about 1/2 teaspoon per cookie works perfectly. Also, thick jams or jellies tend to stay in place better during baking.
Can I double the recipe for a larger batch?
Absolutely! This Peanut Butter and Jelly Cookies Recipe scales easily. Just double all the ingredients and bake the cookies on multiple sheets as needed. Keep an eye on baking times as ovens can vary when baking larger quantities.
Final Thoughts
There is something truly magical about the Peanut Butter and Jelly Cookies Recipe that brings a smile with every bite. It’s a simple, nostalgic treat that packs intense flavor and delightful texture, perfect for sharing or savoring solo. I encourage you to try this recipe soon and experience how easy it is to create a dessert that feels like a warm, comforting hug from your past. Happy baking!
Print
Peanut Butter and Jelly Cookies Recipe
- Prep Time: 10 minutes
- Cook Time: 10 minutes
- Total Time: 20 minutes
- Yield: 12 servings
- Category: Dessert
- Method: Baking
- Cuisine: American
- Diet: Gluten Free
Description
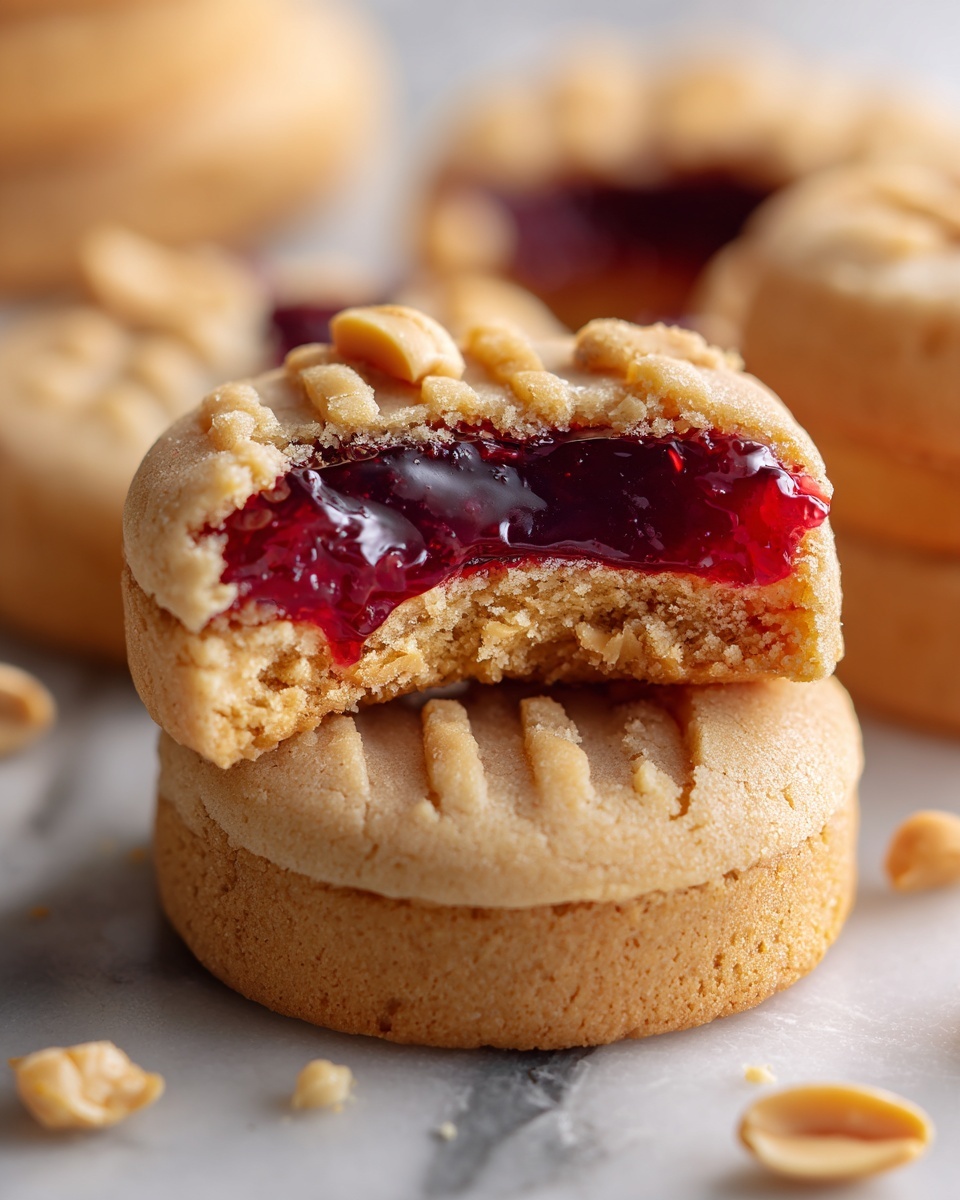
Delight in these soft and chewy Peanut Butter and Jelly Cookies that bring the classic sandwich flavors into a sweet, bite-sized treat. Perfectly balanced with creamy peanut butter and a touch of your favorite jelly or jam, these cookies are quick to make and a guaranteed crowd-pleaser.
Ingredients
Cookie Dough
- 1 cup creamy peanut butter
- 1 cup granulated sugar
- 1 large egg
- 1 teaspoon vanilla extract
- 1/2 teaspoon baking soda
- 1/4 teaspoon salt
Filling
- 1/4 cup fruit jelly or jam (strawberry, grape, raspberry, or your favorite flavor)
Instructions
- Preheat the Oven: Preheat your oven to 350°F (175°C) and prepare a baking sheet by lining it with parchment paper or a silicone baking mat to prevent sticking.
- Mix the Dough: In a large bowl, combine the creamy peanut butter, granulated sugar, egg, vanilla extract, baking soda, and salt. Stir thoroughly until the mixture forms a smooth, sticky dough.
- Form the Cookie Balls: Scoop approximately 1 tablespoon of dough and roll it into a ball. Place each dough ball on the prepared baking sheet, spacing them about 2 inches apart to allow room for spreading.
- Create Wells: Using the back of a spoon or a fork, gently press the center of each dough ball to create a small well or indentation for the jelly filling.
- Add the Jelly: Spoon about 1/2 teaspoon of your chosen jelly or jam into each well. Be careful to avoid overfilling to prevent jelly from spilling over during baking.
- Bake the Cookies: Bake in the preheated oven for 8-10 minutes until the edges turn golden brown. The centers will remain soft and chewy—cookies will firm up as they cool.
- Cool the Cookies: Allow the cookies to cool on the baking sheet for 5 minutes to set, then transfer them to a wire rack to cool completely before serving.
Notes
- You can experiment with different flavors of jelly or jam to customize the taste.
- For a crunchier texture, add chopped peanuts to the dough.
- These cookies store well in an airtight container at room temperature for up to 3 days.
- To keep cookies softer, add a tablespoon of honey or reduce baking time slightly.

