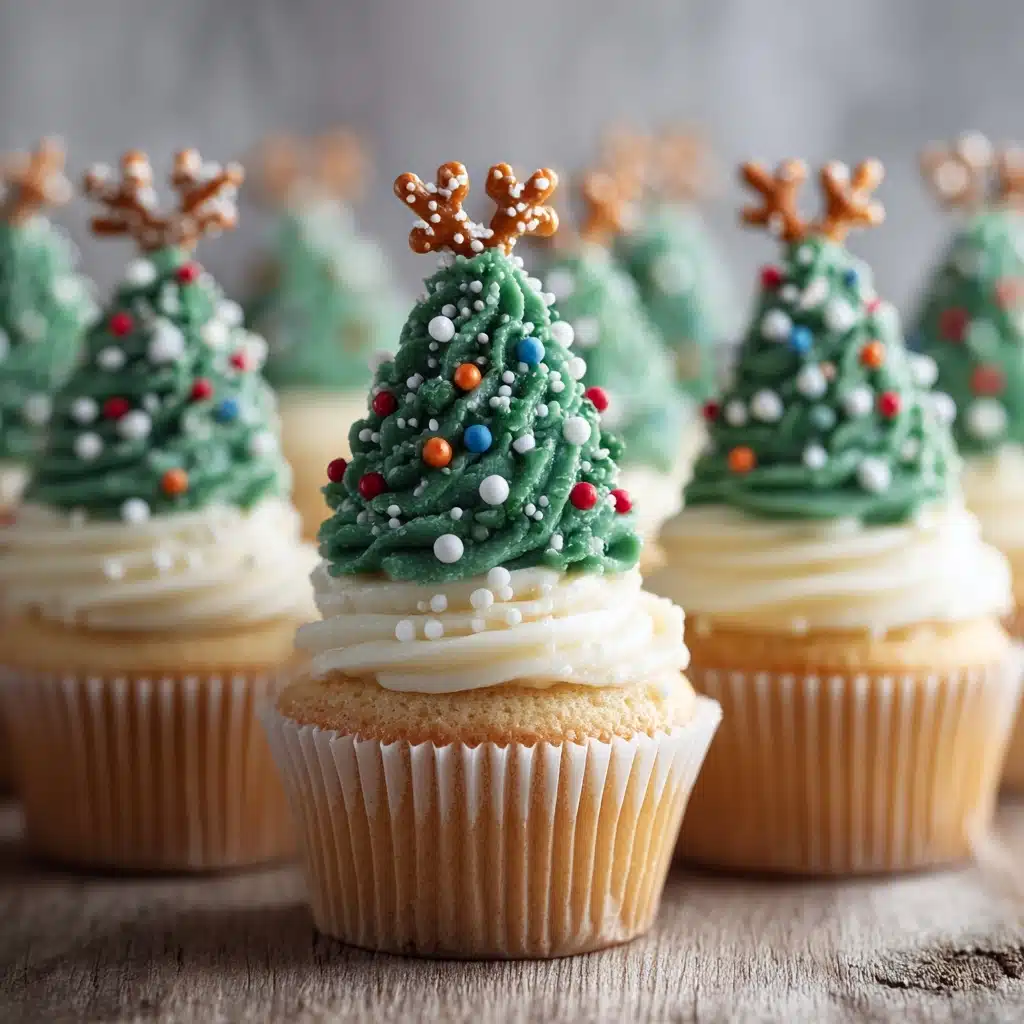
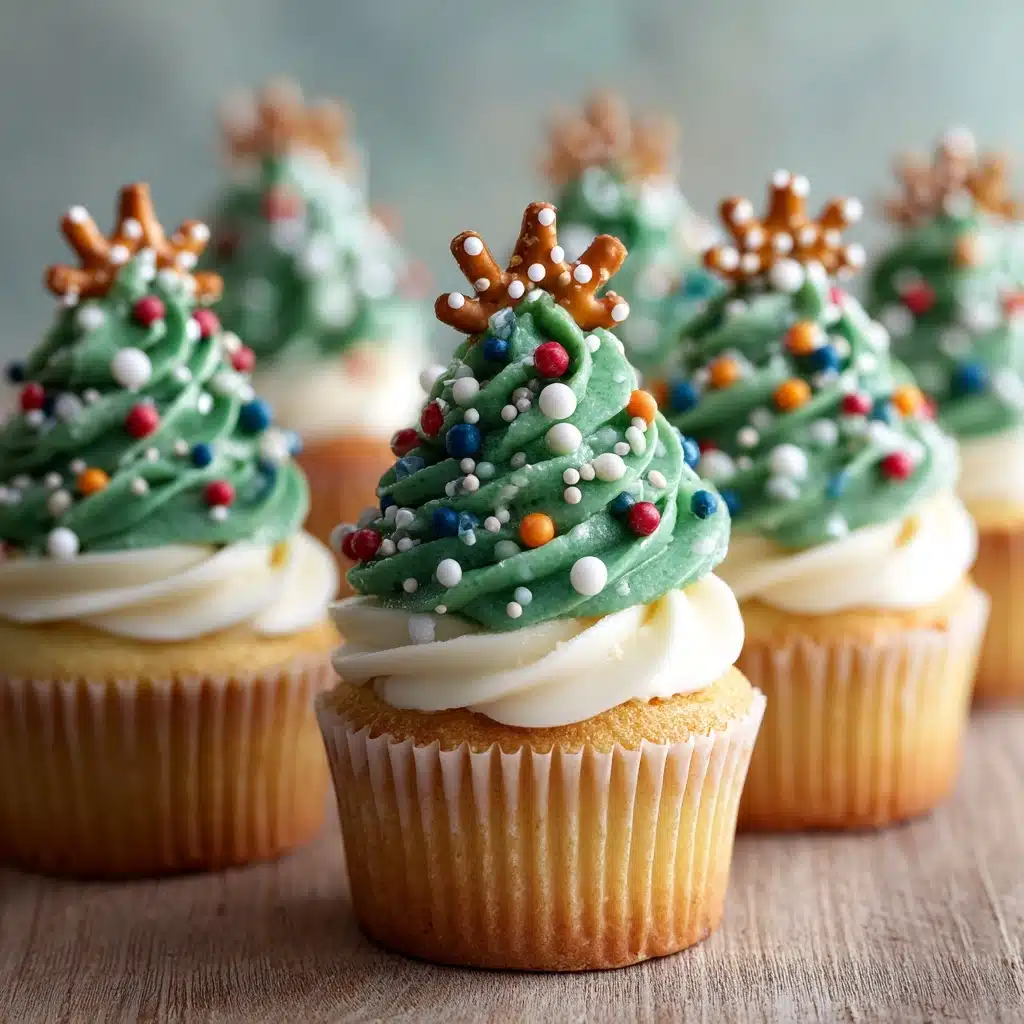
If you’re searching for a show-stopping holiday treat that tastes as magical as it looks, these Christmas Tree Cupcakes are the answer! With moist vanilla cake, fluffy green buttercream, and whimsical “trees” made from ice cream cones, they’re a guaranteed hit for kids and adults alike. Whether you’re inviting friends over for a cookie swap or want to create edible centerpieces for your Christmas dinner, these cupcakes bring festive cheer to every table. Plus, they’re such fun to decorate, making them the perfect family baking project.
Ingredients You’ll Need
Don’t be intimidated by their fanciful appearance—these Christmas Tree Cupcakes come together with simple, pantry-friendly ingredients! Each element plays a magical role, from the rich vanilla cake to the creamy, vibrant frosting and all the playful toppings that turn your cupcakes into tiny evergreens.
- All-purpose flour: The backbone of your cupcake, giving it structure and a tender crumb.
- Baking powder: Adds essential lift for that perfectly domed cupcake top.
- Baking soda: Works with the baking powder to guarantee a light, fluffy texture.
- Salt: Just a pinch brings out all the delicious vanilla and buttery flavors.
- Unsalted butter (for cake and frosting): Softened to room temperature, it creates the richest, most flavorful base for both your cupcakes and frosting.
- Granulated sugar: Sweetens your cupcakes and helps them brown beautifully in the oven.
- Large eggs: Bind the batter together and add extra richness.
- Vanilla extract (for cake and frosting): Rounds out all the holiday flavors—don’t skimp!
- Whole milk: Makes the cupcakes moist and tender (feel free to swap for your favorite milk if needed).
- Powdered sugar: Essential for a smooth, creamy buttercream that pipes like a dream.
- Heavy cream: Adds lusciousness and helps the frosting whip up light and fluffy.
- Green gel food coloring: A little goes a long way for that perfect evergreen shade.
- Mini star sprinkles: The finishing touch for your Christmas tree’s “star.”
- Holiday sprinkles and mini M&Ms: Create colorful “ornaments” on your trees—let your creativity shine!
- Ice cream cones (flat-bottomed or sugar cones): Form the iconic tree shape and give your cupcakes height and fun crunch.
How to Make Christmas Tree Cupcakes
Step 1: Prepare Your Cupcake Batter
First things first, preheat your oven to 350°F (175°C) and line a 12-cup muffin tin with festive cupcake liners. In a medium bowl, whisk together the flour, baking powder, baking soda, and salt—this keeps your dry ingredients evenly distributed for a perfect rise. In a separate large bowl, cream the softened butter and sugar together until it’s light and fluffy (this is what makes your cupcakes so pillowy!). Add the eggs one at a time, mixing well after each, then stir in the vanilla. Alternate adding the dry ingredients and milk to the butter mixture, mixing gently. You want everything just combined, so your cupcakes stay tender.
Step 2: Bake the Cupcakes
Divide the batter evenly among your cupcake liners—about two-thirds full is just right. Bake for 18 to 20 minutes, or until a toothpick poked into the center comes out clean. The kitchen will smell like pure holiday magic! Let the cupcakes cool in the tin for a few minutes, then transfer them to a wire rack to cool completely. This ensures your frosting won’t melt when you decorate.
Step 3: Make the Green Buttercream Frosting
While your cupcakes cool, whip up the buttercream. Beat the softened butter until creamy and smooth, then gradually add the powdered sugar, mixing well. Pour in the heavy cream and vanilla extract, then whip until light and fluffy. Now for the fun part—add green gel food coloring, a little at a time, until you’ve got that perfect Christmas tree green. This is your chance to get creative: go bold and bright, or keep it soft and piney!
Step 4: Assemble the Christmas Tree Cupcakes
Spread a flat layer of green frosting on top of each cooled cupcake. This helps anchor the “tree” in place. Next, gently invert an ice cream cone onto each cupcake, pressing down lightly so it sticks. With a piping bag fitted with a star tip (or just snip the corner off a zip-top bag for a rustic look), pipe swirls or stars of green buttercream all around the cone to mimic fluffy tree branches. Don’t worry about perfection—the more whimsical, the better!
Step 5: Decorate Your Trees
Now the real fun begins. Sprinkle your “trees” with mini M&Ms and holiday sprinkles to look like ornaments, then crown each one with a mini star sprinkle right at the top. This is a fantastic step to let kids help with—there are no rules, only festive creativity. Your Christmas Tree Cupcakes are ready to steal the show!
How to Serve Christmas Tree Cupcakes
Garnishes
The magic really comes alive with the right finishing touches. Besides the classic mini star on top, try a dusting of edible glitter or a light snowfall of powdered sugar for extra sparkle. You can even pipe little “garlands” with white icing for an extra-special effect. The more you dress them up, the more they’ll dazzle on the dessert table!
Side Dishes
If you’re building a dessert spread, these cupcakes pair beautifully with hot chocolate, peppermint bark, or a platter of gingerbread cookies. The soothing vanilla flavors work well alongside spiced treats, while the playful look brings balance to more traditional sweets. Serve with fresh berries or a scoop of vanilla ice cream for an extra treat.
Creative Ways to Present
Christmas Tree Cupcakes look fantastic when arranged on a cake stand, but why not go all out? Try lining them up on a faux “forest floor” made from crushed graham crackers or coconut flakes. Tuck a few candy canes or wrapped chocolates between the trees for a whimsical edible landscape. You can even use them as place cards by attaching a festive tag to each cupcake—guests will love the personal touch!
Make Ahead and Storage
Storing Leftovers
If you find yourself with extra cupcakes (lucky you!), store them in an airtight container at room temperature for up to two days. If your kitchen is particularly warm or humid, pop them in the fridge, but let them come to room temperature before serving for the best taste and texture.
Freezing
You can freeze the unfrosted cupcakes for up to three months—just wrap them tightly in plastic wrap and place in a zip-top bag. When ready to use, thaw at room temperature, then decorate as usual. While the frosted cones don’t freeze as well, you can prep the buttercream ahead and freeze it separately for convenience.
Reheating
While you don’t need to reheat these Christmas Tree Cupcakes, if you want to refresh them, simply let them come to room temperature if chilled. If the cake feels a bit dry, a quick 5–10 seconds in the microwave (without the cone) will work wonders. Always frost and assemble just before serving for the very best texture and crunch.
FAQs
Can I make Christmas Tree Cupcakes ahead of time?
Absolutely! Bake the cupcakes a day in advance and keep them unfrosted in an airtight container. Assemble and decorate just before serving so the cones stay crisp and the buttercream looks picture-perfect.
What’s the best way to color the frosting?
Gel food coloring is your best friend here—it creates vivid, even color without thinning out the frosting. Start with a little and add more as needed to reach your desired shade. Liquid food coloring can work in a pinch, but use sparingly.
Can I use a cake mix for the base?
Of course! If you’re short on time, a boxed vanilla or even chocolate cake mix works great. Just follow the decorating instructions for the signature Christmas Tree Cupcakes look. Your secret is safe with me!
What if I don’t have a piping bag?
No worries at all! Just spoon the green frosting into a zip-top plastic bag, snip off a corner, and pipe away. You can also use a butter knife for a rustic, snow-laden tree effect—imperfection is part of the charm!
How do I keep the cones from getting soggy?
The trick is to assemble just before serving and make sure your cupcakes are fully cooled. The buttercream base helps keep the cones crisp, and a thick layer of frosting on the outside protects the cone from moisture. Store leftovers loosely covered to prevent excess condensation.
Final Thoughts
If you’re looking to add a burst of holiday cheer to your dessert table, these Christmas Tree Cupcakes are a must-try. They’re as delightful to make as they are to eat, and guaranteed to bring smiles to everyone who sees them. Gather your loved ones, get creative with the decorations, and let these cupcakes be the sweet centerpiece of your festive celebrations!