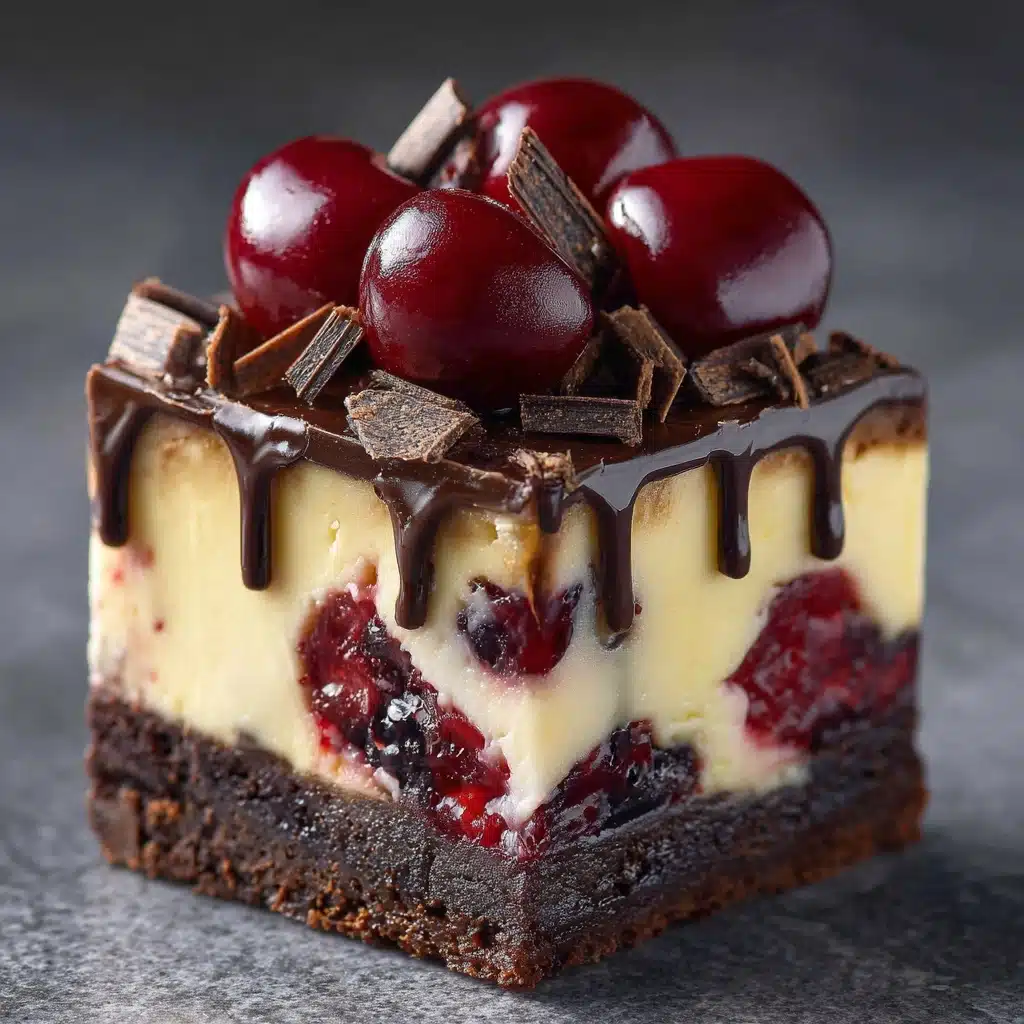
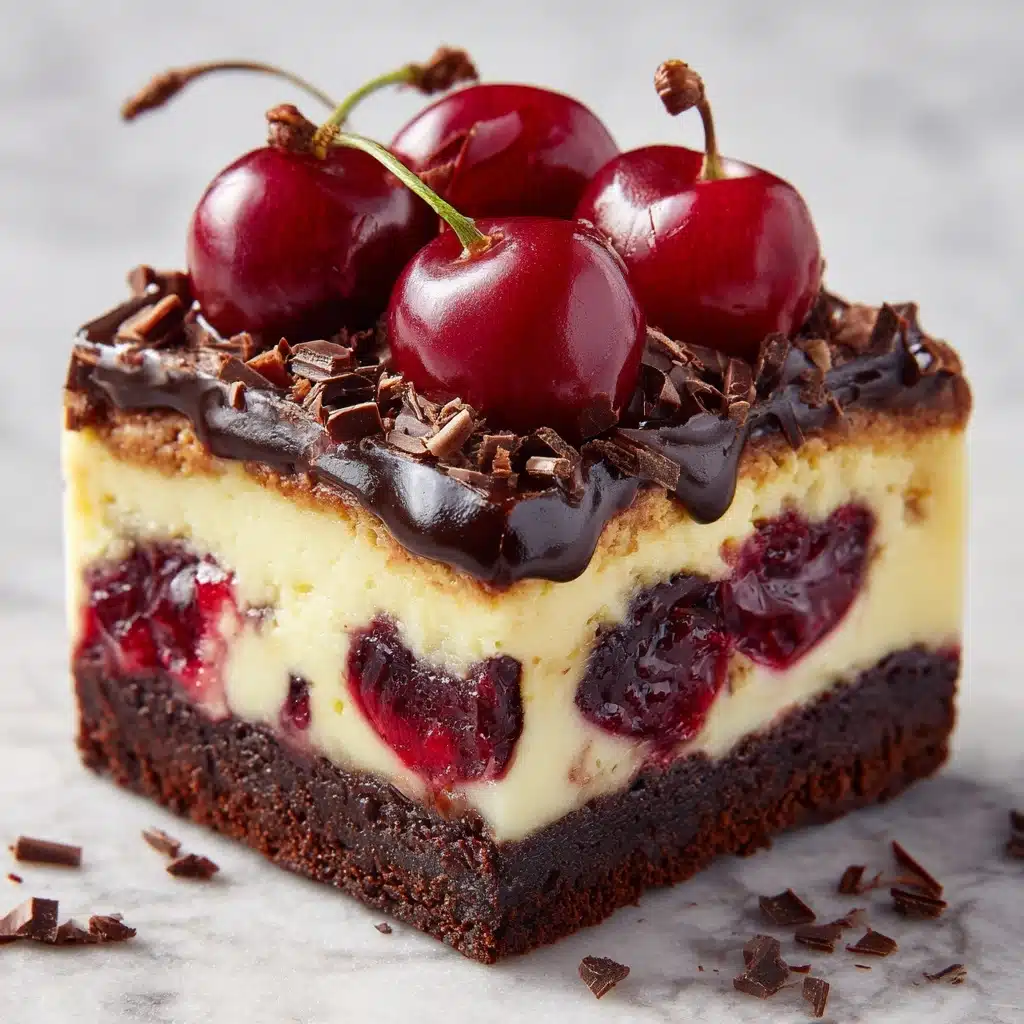
If you’re searching for a dazzling dessert that balances creamy, chocolaty richness with bursts of juicy fruit, these Chocolate Cherry Cheesecake Bars are about to become your new go-to treat. They layer a crisp chocolate cookie crust, velvety cheesecake, sweet cherry swirls, and a decadent chocolate ganache—all in a convenient, sliceable bar. These bars are pure bliss for family celebrations, casual gatherings, or anytime you want an easy yet impressive dessert. With their vibrant colors and indulgent flavor, Chocolate Cherry Cheesecake Bars are sure to steal the show every single time!
Ingredients You’ll Need
What I love about this recipe is how it transforms everyday ingredients into something extraordinary. Each component is simple, but together they deliver big on flavor, texture, and visual appeal. Here’s how each element makes these bars irresistible.
- Chocolate cookie crumbs: These form the base, adding chocolaty crunch as the perfect foil for the creamy cheesecake.
- Unsalted butter, melted: Binds the crumbs into a cohesive crust and adds richness you can taste in every bite.
- Cream cheese, softened: Always use room-temperature cream cheese for a smooth, lump-free cheesecake layer.
- Granulated sugar: Sweetens the filling just right without overpowering the fruit or chocolate layers.
- Large eggs: Eggs create that luscious, custardy texture in the cheesecake and help it set properly.
- Vanilla extract: Enhances the subtle sweetness and rounds out all the other flavors.
- Almond extract (optional): Just a hint of almond makes cherries pop even more—don’t skip it if you have it!
- Cherry pie filling: Adds juicy pops of color and flavor. Go ahead and use homemade cherry compote if you like.
- Semi-sweet chocolate chips: For a glossy, chocolatey finish that’s not too sweet and adds a decadent layer on top.
- Heavy cream: Makes the chocolate topping rich, silky, and perfectly spreadable.
How to Make Chocolate Cherry Cheesecake Bars
Step 1: Prep Your Pan and Preheat
Get started by preheating your oven to 325°F (160°C). Line an 8×8-inch baking pan with parchment paper, letting a little hang over the sides for easy lifting later. This little bit of prep ensures your Chocolate Cherry Cheesecake Bars will release from the pan in one beautiful piece.
Step 2: Build the Chocolate Cookie Crust
In a medium bowl, mix chocolate cookie crumbs with the melted unsalted butter until all the crumbs are moistened. Press this mixture firmly into the base of the pan with your hands or the back of a measuring cup, creating an even layer. Bake for 8 to 10 minutes until set, then let the crust cool slightly—this step keeps the crust crisp under the creamy cheesecake.
Step 3: Make the Cheesecake Layer
In a large bowl, beat the softened cream cheese with sugar until super smooth and creamy, scraping the bowl as needed. Add eggs, one at a time, beating until just combined after each. At this point, blend in your vanilla and almond extract. Pour this luscious batter over your crust and use a spatula to gently spread it out.
Step 4: Swirl in the Cherries
Drop spoonfuls of cherry pie filling evenly over the cream cheese layer. Grab a butter knife and carefully swirl the cherries through the cheesecake batter, creating streaks of red fruit throughout. Don’t overmix; you want distinct, pretty ribbons of cherry in every square.
Step 5: Bake and Chill
Bake your layered masterpiece for 30 to 35 minutes, just until the center is set and doesn’t jiggle much when you nudge the pan. Cool to room temperature, then transfer to the fridge for at least 4 hours, or preferably overnight. The chilling time sets the layers and melds all those delicious flavors.
Step 6: Add the Chocolate Ganache Topping
Warm the heavy cream until just steaming, then pour it over the chocolate chips in a small bowl. Let it sit for a couple minutes before stirring until smooth and silky. Pour the ganache over the chilled cheesecake bars and spread it evenly with an offset spatula. Pop the pan back in the fridge for another 30 minutes so the chocolate topping can firm up before slicing.
How to Serve Chocolate Cherry Cheesecake Bars
Garnishes
The final flourish makes all the difference! Try a sprinkle of chopped chocolate, sliced almonds, or a few extra cherries on top. A light dusting of powdered sugar before serving is both pretty and classic for these Chocolate Cherry Cheesecake Bars.
Side Dishes
Pair these bars with coffee, a mug of hot cocoa, or a glass of cold milk. If you’re hosting a dessert buffet, add a medley of fresh berries or a bowl of lightly sweetened whipped cream on the side for those who want to add a little extra to their plate.
Creative Ways to Present
Cut the bars into signature squares for a potluck or party tray, or go playful and slice them into skinny fingers for a dessert platter. Stack them on a tiered cake stand or wrap individual pieces in wax paper tied with twine for edible gifts—Chocolate Cherry Cheesecake Bars travel beautifully for picnics and gatherings.
Make Ahead and Storage
Storing Leftovers
Once cut, store any remaining bars in an airtight container in the refrigerator, where they’ll stay delicious for up to 5 days. The flavors actually improve as they sit, and the creamy texture holds up wonderfully.
Freezing
If you’re making ahead or want to stash a few for later, Chocolate Cherry Cheesecake Bars freeze quite well. Arrange slices on a baking sheet, freeze until firm, then wrap each bar individually and pop them in a freezer bag. Thaw overnight in the fridge before serving for best results.
Reheating
These bars are meant to be enjoyed chilled or at cool room temperature, so there’s no need to reheat. Let them sit out for 10–15 minutes before serving if you’ve just pulled them from the fridge to reach their creamiest consistency.
FAQs
Can I use fresh cherries instead of pie filling?
Absolutely! If it’s cherry season, gently simmer fresh cherries with a bit of sugar and cornstarch to make your own quick compote. Let this cool before swirling it into your cheesecake layer for a vibrant, homemade touch.
How do I make clean slices without the layers smearing?
The trick is letting your Chocolate Cherry Cheesecake Bars chill thoroughly, then dipping your sharp knife in hot water and wiping it clean between cuts. This keeps edges sharp and the layers crisp and defined.
Can I double the recipe for a bigger crowd?
No problem! Simply double all ingredients and use a 9×13-inch pan. The baking time may be a little longer, so keep an eye on the center and check for doneness as you would for the original size.
What’s the best way to melt the chocolate for the topping?
Gently heating the cream until steaming but not boiling, then letting it sit over the chocolate chips before stirring ensures a silky ganache without risk of scorching. Resist microwaving them both together, as overheating can separate the chocolate.
Are Chocolate Cherry Cheesecake Bars suitable for a vegetarian diet?
Yes, these bars do not contain gelatin or other animal derivatives beyond dairy and eggs, so they fit perfectly into a vegetarian dessert lineup. Just ensure that your cookie crumbs and chocolate chips are also vegetarian-friendly.
Final Thoughts
This dessert is one of those rare treats that wows every single time—with minimal fuss, maximum reward, and a flavor combination that simply can’t be beat. I hope your kitchen fills with sweet scents and happy memories when you whip up a batch of Chocolate Cherry Cheesecake Bars. Grab your favorite pan, gather your friends, and let the baking (and celebrating) begin!