If you’re craving an impossibly fun and playful twist on classic fudge, Homemade Cotton Candy Fudge is about to become your new sweet obsession. This easy no-bake treat takes all the nostalgic joy of cotton candy and transforms it into creamy, swirled squares with vibrant colors and a hint of magical whimsy. Each bite melts in your mouth, delivering a deliciously sweet flavor that instantly transports you to sunny days at the fair. Whether you’re whipping up a batch for a party, a bake sale, or just a cozy night in with friends, Cotton Candy Fudge promises to add a spark of childhood wonder to any occasion.
Ingredients You’ll Need
-
Ingredients:
- 2 cups white chocolate chips
- 1 can (14 oz) sweetened condensed milk
- 1 tsp cotton candy flavoring
- pink and blue gel food coloring
- pastel sprinkles for topping (optional)
How to Make Homemade Cotton Candy Fudge
Step 1: Prepare Your Baking Dish
Begin by lining an 8×8-inch baking dish with parchment paper, making sure there’s a bit of overhang on each side. This will help you lift the fudge easily once it’s set, saving lots of fuss later. If you want perfectly crisp edges on your fudge pieces, don’t skip this step!
Step 2: Melt the Chocolate and Milk
In a medium saucepan set over low heat, combine the white chocolate chips and the sweetened condensed milk. Stir gently and patiently until everything is melted and completely smooth. Take your time here—the low heat ensures you don’t burn the chocolate or risk any graininess in your fudge.
Step 3: Add the Flavor Magic
Remove the pan from the heat and quickly stir in your cotton candy flavoring. You’ll immediately notice the sweet aroma wafting up! Mix well until it’s fully incorporated to guarantee every bite tastes like a trip to the carnival.
Step 4: Color and Divide
Pour the fudge mixture evenly into two separate bowls. In one bowl, add a dab of pink gel food coloring; in the other, add blue. Gently stir each one until you’re happy with the pastel candy colors. If you want an extra-vivid swirl, feel free to adjust the color intensity with a few more drops!
Step 5: Swirl and Set
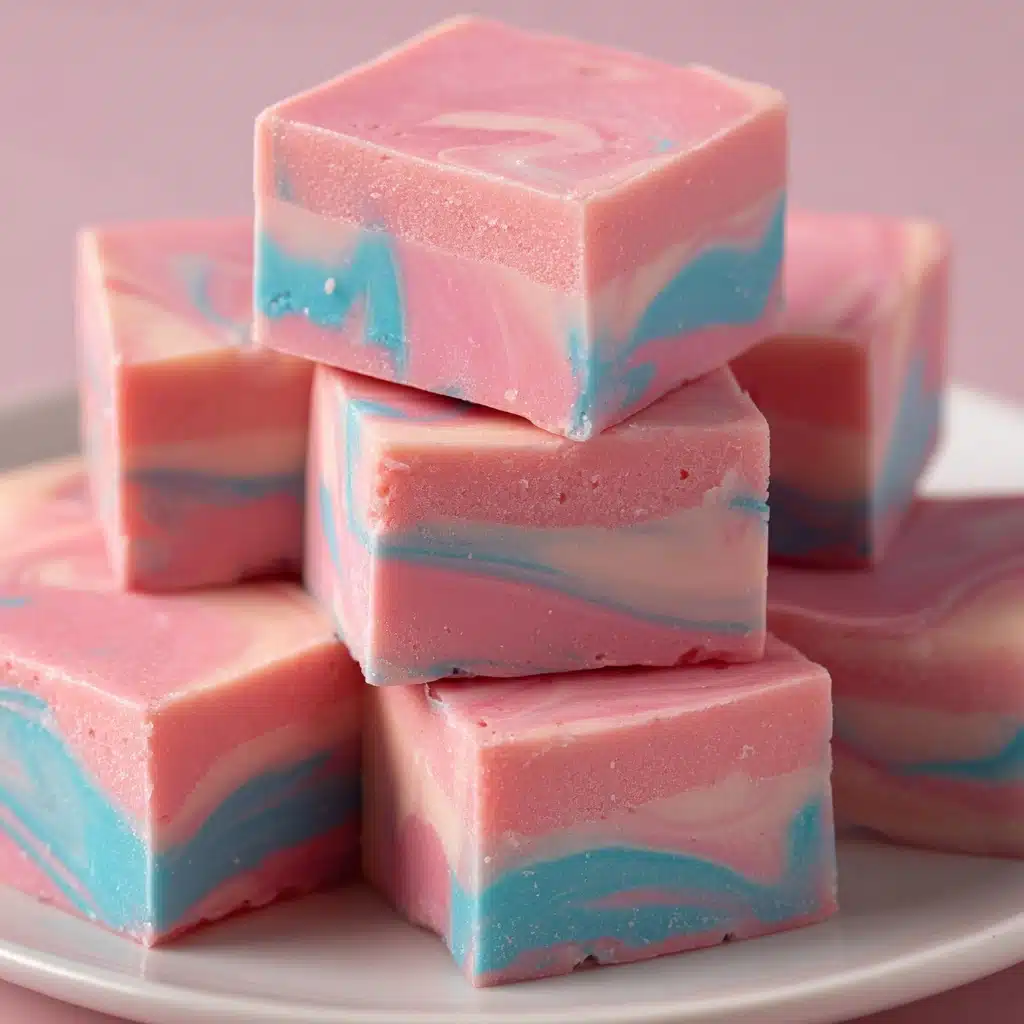
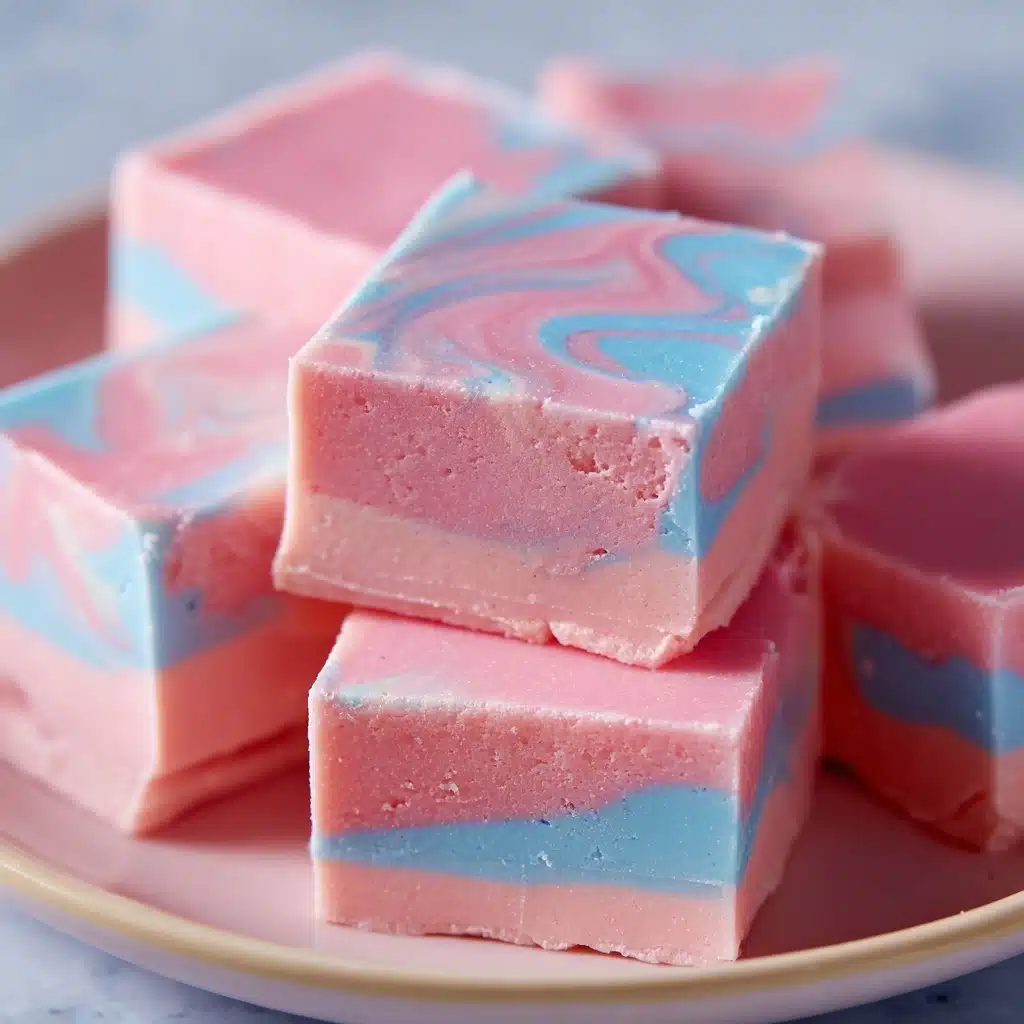
Alternately spoon the pink and blue fudge mixtures into your lined baking pan, creating splotches of color throughout. With a clean knife or skewer, gently swirl the colors together for a marbled effect—don’t overmix, or you’ll lose those dreamy cotton candy swirls! If you like, finish with a shower of pastel sprinkles for a gorgeous touch. Refrigerate the pan for at least 2 hours or until the fudge is firm and set.
Step 6: Slice and Serve
Once the Homemade Cotton Candy Fudge is chilled and firm, lift it out of the pan using the parchment paper. Use a sharp knife to cut it into small, bite-sized squares. The vibrant colors and creamy texture will leave everyone smiling at first glance—and first bite!
How to Serve Homemade Cotton Candy Fudge
Garnishes
Dress up your fudge with all kinds of playful garnishes—think pastel or rainbow sprinkles, shimmering edible glitter, or a scattering of finely crushed cotton candy for an even sweeter presentation. Piled high on a beautiful cake stand, these colorful squares signal a party before anyone’s even tasted them!
Side Dishes
Balance out your decadent Homemade Cotton Candy Fudge with simple sides. A bowl of fresh strawberries or raspberries is the perfect fruity complement, or offer crunchy pretzels for a salty-sweet combo that makes the flavor really pop. For parties, serve alongside classic fair-inspired treats like popcorn or lemonade for an irresistible dessert table.
Creative Ways to Present
There’s no limit to the fun ways you can present your fudge! Wrap pieces individually in cellophane with pastel ribbons for birthday party favors, or stack them in clear jars for a DIY edible centerpiece. At baby showers or themed events, arrange fudge squares into color-coordinated displays that double as seasonal décor and irresistible treats.
Make Ahead and Storage
Storing Leftovers
Keep your Homemade Cotton Candy Fudge as fresh as possible by storing it in an airtight container in the refrigerator. The fudge will stay silky-smooth and delicious for up to one week, making it an ideal make-ahead treat for busy schedules or party planning.
Freezing
If you want to enjoy your fudge down the line, you absolutely can freeze it. Layer the squares between pieces of parchment paper in an airtight container or freezer-safe bag. They’ll keep well for up to two months—just let them thaw in the fridge overnight before serving for the best texture.
Reheating
Fudge is usually at its best served chilled or at room temperature, but if you’ve stored it in the freezer, let it come to fridge temp slowly to avoid condensation or stickiness. Avoid microwaving, as it can cause melting or make the texture grainy.
FAQs
Can I use regular chocolate instead of white chocolate chips?
White chocolate is key for both the signature flavor and pale base that allows the cotton candy colors to shine. While you can experiment with other chocolates, milk or dark would overpower both the look and the unique taste of Homemade Cotton Candy Fudge.
Where can I buy cotton candy flavoring?
You can usually find cotton candy flavoring online, at baking supply stores, or in well-stocked grocery stores near extracts and specialized flavors. It’s a tiny bottle, but just a bit goes a long way!
Can I use liquid food coloring instead of gel?
Gel food coloring is recommended because it delivers intense color without watering down your fudge. If you only have liquid, use it sparingly, or your mixture might become a bit too soft to set properly.
How do I get clean, neat squares when cutting the fudge?
For perfect slices, use a sharp, large knife and wipe it clean between cuts. Chilling the fudge fully and using parchment overhang to lift it from the pan also helps enormously with neat edges.
Is Homemade Cotton Candy Fudge gluten-free?
Yes! All the listed ingredients are naturally gluten-free, but always double-check your cotton candy flavoring and sprinkles if you’re serving someone with allergies, as some brands may have cross-contamination or added gluten.
Final Thoughts
I can’t recommend Homemade Cotton Candy Fudge enough for anyone who loves a touch of whimsy and nostalgia in their desserts. Every swirl and every bite brings a little happiness and a lot of flavor—perfect for celebrations or simply sharing a little sweetness with friends. Give it a try and let it brighten up your day!