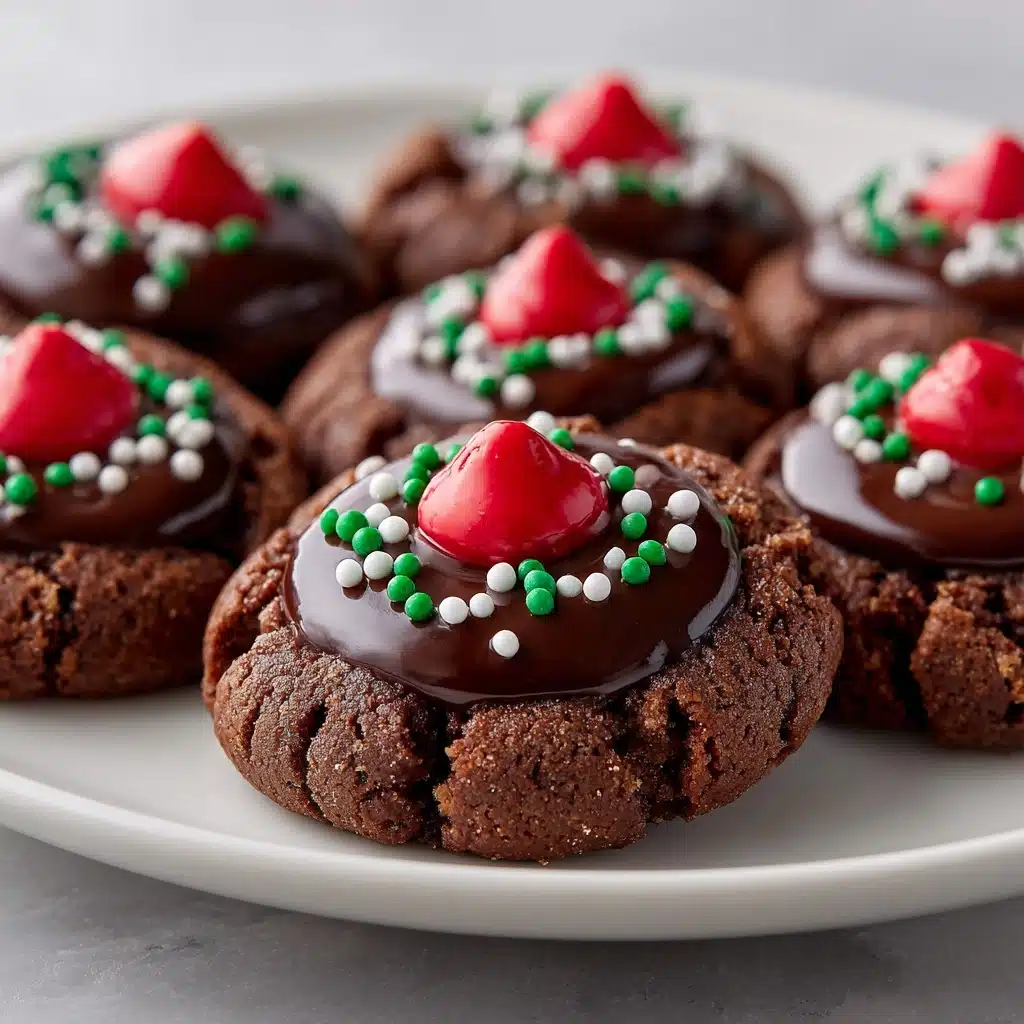
If there’s one treat I find myself making for every holiday, family gathering, or cozy evening in, it’s Chocolate Kiss Cookies. With their buttery cookie base, melt-in-your-mouth chocolate chips, and that iconic glossy Hershey’s Kiss perched right on top, these cookies are pure crowd-pleasers! The beauty of this recipe is in its simplicity and the delightful combination of flavors and textures. Chocolate Kiss Cookies are a universally loved comfort dessert that never lasts long around my kitchen, and after one bite, you’ll see why!

Ingredients You’ll Need
Chocolate Kiss Cookies are all about taking a handful of simple pantry staples and turning them into magic. Each ingredient plays a small but mighty role, coming together to create cookies that are tender, chocolatey, and absolutely irresistible.
- Unsalted Butter (1 cup, softened): Creates that rich, melt-in-your-mouth texture and allows you to control the saltiness of the dough.
- Granulated Sugar (1 cup): Gives structure and sweetness, helping the cookies turn just a touch golden.
- Packed Brown Sugar (1/2 cup): Adds a hint of caramel flavor and extra chewiness to the cookie base.
- Large Eggs (2): Bind everything together and give the cookies that perfect, tender crumb.
- Vanilla Extract (1 teaspoon): Enhances all the chocolatey goodness with a warm, aromatic note.
- All-Purpose Flour (2 1/4 cups): The backbone of these cookies—balances out the wet ingredients for the ideal structure.
- Baking Soda (1/2 teaspoon): Lifts the dough so each cookie bakes up soft and light.
- Salt (1/4 teaspoon): Sharpens the flavors so the sweetness and chocolate shine.
- Semi-sweet Chocolate Chips (1 cup): Brings extra pockets of chocolatey delight in every single bite.
- Hershey’s Kisses (about 36, unwrapped): The star! Their cute shape and creamy chocolate center make these cookies instantly recognizable and SO much fun.
How to Make Chocolate Kiss Cookies
Step 1: Preheat and Prep
Set the stage for effortless baking by preheating your oven to 350°F (175°C). Line your baking sheets with parchment paper—this not only prevents sticking, but also makes cleanup a breeze.
Step 2: Cream the Butter and Sugars
In a large mixing bowl, cream together the softened butter, granulated sugar, and brown sugar until the mixture is fluffy and pale in color. This step is crucial, as it creates the soft, airy texture that makes Chocolate Kiss Cookies irresistible.
Step 3: Add Eggs and Vanilla
Crack in the eggs one at a time, mixing well after each addition, then stir in the vanilla extract. These ingredients help bind everything together and infuse the dough with that classic bakery aroma.
Step 4: Combine Dry Ingredients
In a separate bowl, whisk together the flour, baking soda, and salt. Whisking ensures every bite will be perfectly risen and evenly flavored, without any sneaky clumps.
Step 5: Bring Everything Together
Gently add the dry ingredients into the wet mixture in batches, stirring just until combined—don’t overmix! At this point, fold in the chocolate chips so every cookie is dotted with chocolatey goodness.
Step 6: Shape and Bake
Drop rounded tablespoons of dough onto your prepared baking sheets, allowing about two inches between each mound for spreading. Bake for 8 to 10 minutes, or until the edges turn golden but the centers still look soft and puffy.
Step 7: Add the Kisses
As soon as the cookies come out of the oven, gently press an unwrapped Hershey’s Kiss into the center of each one. The residual warmth will slightly melt the chocolate, anchoring it just enough. Let the cookies cool on the baking sheet for five minutes before moving them to a wire rack to cool completely.
How to Serve Chocolate Kiss Cookies

Garnishes
For an extra flourish, you can dust the cookies with a light sprinkle of powdered sugar or a pinch of flaky sea salt. Either choice adds both style and just a little extra pop of flavor to the chocolate and cookie combo.
Side Dishes
Chocolate Kiss Cookies shine all on their own, but they’re dreamy with a glass of cold milk, steamy hot cocoa, or strong coffee. If you’re serving a dessert platter, try sandwiching them between slices of fresh fruit or alongside vanilla ice cream for a playful mix of textures.
Creative Ways to Present
These cookies look adorable piled high on a pretty plate, but for special occasions, consider wrapping them in clear cellophane with a festive ribbon, or nestling them in cupcake liners for a homemade gift that’s as cute as it is delicious.
Make Ahead and Storage
Storing Leftovers
Once the Chocolate Kiss Cookies have completely cooled, keep them in an airtight container at room temperature. They’ll stay fresh and chewy for up to five days—though in my house, they disappear much sooner!
Freezing
If you want to bake ahead, Chocolate Kiss Cookies freeze beautifully. Once baked and cooled, store them in a freezer-safe container for up to two months. You can also freeze pre-portioned dough balls, then bake straight from frozen with just a minute or two extra in the oven.
Reheating
To revive that just-baked warmth, pop a few cookies in the microwave for 5–8 seconds, or briefly in a low oven. This softens the cookie and brings the chocolate back to a perfectly melty state.
FAQs
Can I use different flavors of Hershey’s Kisses?
Absolutely! While the classic milk chocolate Kiss is iconic, feel free to try caramel, almond, or dark chocolate varieties for a fun twist on the original Chocolate Kiss Cookies.
How can I prevent the cookies from getting too hard?
The trick is to avoid overbaking—pull the cookies from the oven when the centers still look slightly underdone, as they’ll finish setting up as they cool. Storing them in an airtight container also helps maintain their softness.
Can I add nuts to the dough?
Chopped pecans or walnuts make a wonderful addition if you like a crunch in your Chocolate Kiss Cookies, but it’s totally optional. Just fold in about half a cup alongside the chocolate chips.
What’s the best way to shape the cookies?
Using a cookie scoop or rounded tablespoons gives uniform results. If you want a perfectly round look, you can gently roll the dough balls between your palms before placing them on the sheet.
Do the Hershey’s Kisses melt completely in the oven?
Nope! The key is to press the Kisses into the cookies right after baking, while the dough is still hot. The chocolate will soften but hold its iconic shape, so every bite is chocolaty and picture-perfect.
Final Thoughts
If you’re searching for an easy, show-stopping treat, Chocolate Kiss Cookies are a must-try. I can’t recommend them enough for gifting, sharing, or just savoring with your favorite drink. Once you taste that playful mix of warm cookie and melty Kiss, you’ll want to make them part of every celebration!
